Part 1 of 4
Setting up your server
What you are building, what it costs, and how to rent and secure the server that will run it.

I’ve easily spent more than 36 hours writing and testing this guide to create a definitive step-by-step on how to build your own OpenClaw, even if you’re not technical, like me. I was frustrated that widely shared guides just gave general instructions, shying away from the many questions I had when trying to get my OpenClaw up and running the first time, which took me a whole weekend.
I’ve had an OpenClaw agent for two months now, and it has been extremely helpful in various areas of my life. When I posted about Arnold, my AI health coach, people reached out asking how to build their own. This is my answer: starting from setting up your virtual private server (so you don’t need to buy a Mac mini), all the way to creating your first agent.
The full guide is published as four articles:
- Setting up your server (Intro → Part 3)
- Installing OpenClaw (Part 4 → Part 6) - link
- Configuring your OpenClaw (Part 7 → Part 10) - link
- Customizing your first agent to your needs (Part 11 → end) - link
The introduction below gives you an overview of what to expect, and then we get to work.
A quick disclaimer
- This is a write-up of what worked for me, offered with no warranties, follow it at your own risk.
- It’s not a security guarantee, and keeping your server secure is your responsibility.
- Costs are real and can change, so watch your own billing (a cloud server bills until you destroy it).
- Referenced tools and services belong to their owners and change over time; this reflects how things worked when written.
Introduction & Prerequisites
What You’re Building
You’re going to rent a small computer (a VPS, Virtual Private Server) and install OpenClaw on it. OpenClaw lets you run AI agents 24/7 with persistent memory, connected to a messaging app like Telegram for easy access from your phone or laptop, integrated with Gmail, Google Calendar, and other services.
How it works:
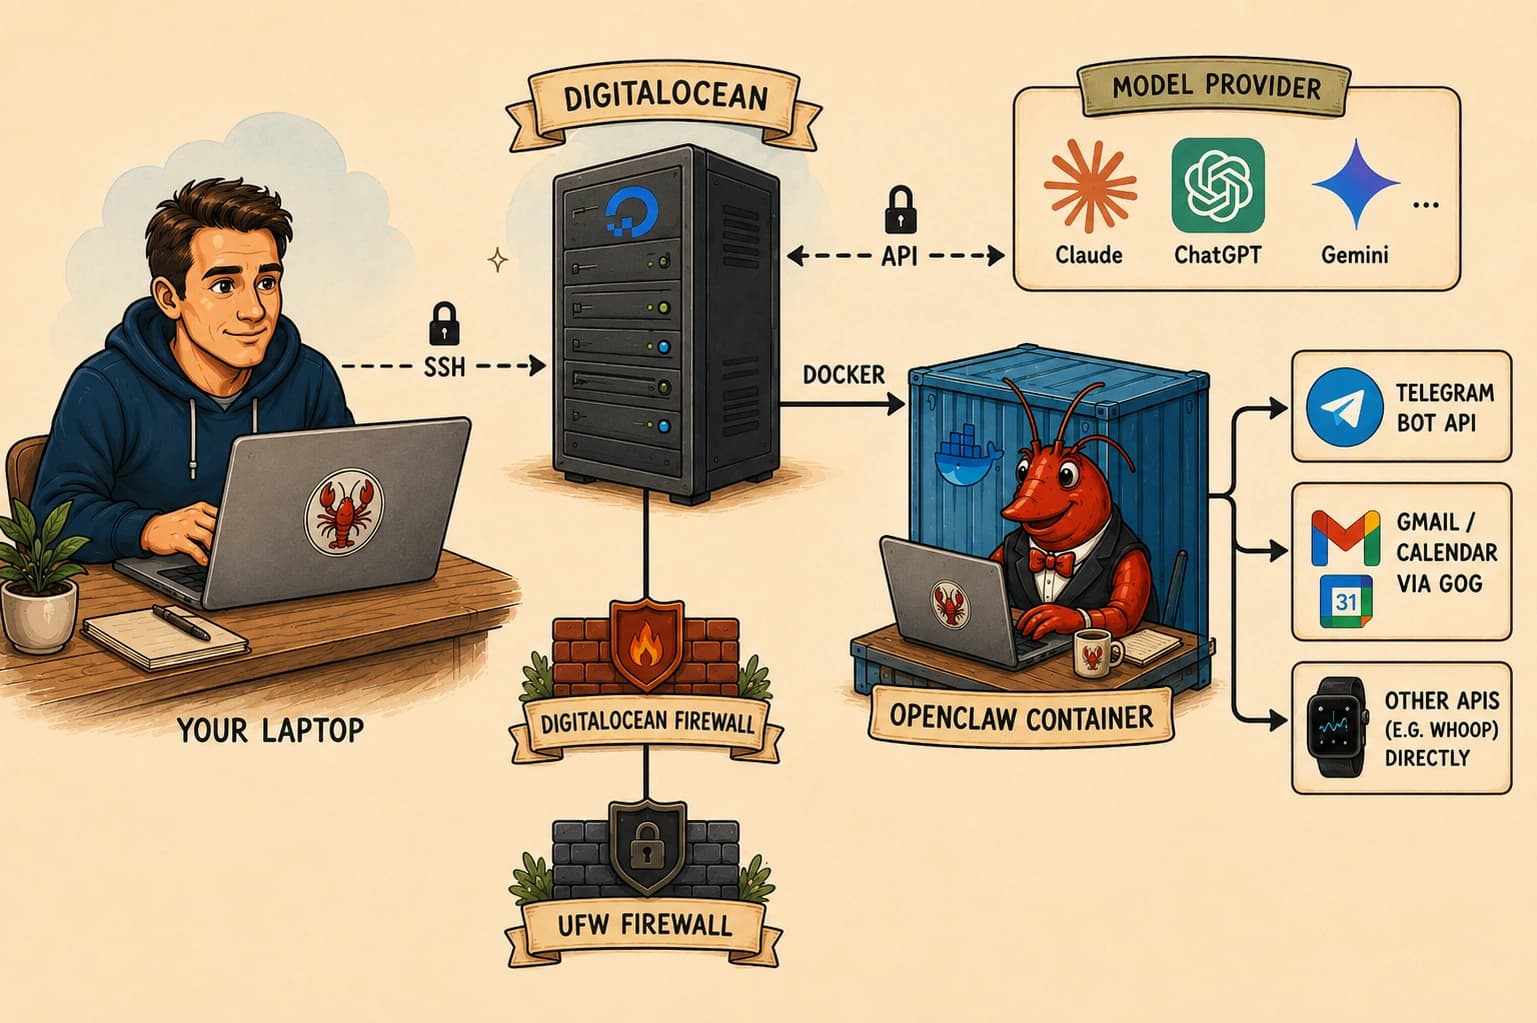
Architecture:
Don’t worry, each of these terms is explained in detail later.
- DigitalOcean server (Droplet): the small computer you’re renting runs 24/7 in a datacenter
- Docker container: OpenClaw runs inside an isolated environment to protect your laptop/computer
- Two firewalls: DigitalOcean Cloud Firewall + Ubuntu’s ufw (plus an optional egress firewall later)
- SSH access: you connect securely to manage the server
- Telegram or any other messaging app: your interface to the agent
- Skills: the installation already comes with a large set of Skills (GitHub, Notion, weather, Google Workspace, and more); you trim to what you use
Prerequisites
What you need before starting:
- Being comfortable using the computer terminal and handling APIs
- Credit/debit card for DigitalOcean (charges monthly)
- Anthropic API account or any other model provider
- Telegram account on your phone (integrating with WhatsApp isn’t as straightforward)
- Google account for Gmail/Calendar integration
- Computer with terminal access (Mac, Windows, or Linux)
- 5 hours of uninterrupted time
Cost Breakdown
Monthly costs (approximate):
Server (DigitalOcean Droplet):
- Base: $24/month for a 4 GB Droplet (billed per second with a monthly cap, so it never exceeds the flat monthly rate)
- Backups (optional): about +20%
- ⚠️ Important: a DigitalOcean server keeps billing even when it’s powered off, because the underlying resources stay reserved for you. To actually stop paying, you need to destroy the Droplet.
Anthropic API:
- Claude Sonnet 4.6: pay-as-you-go per token
- Typical personal use: roughly $100-200/month depending on how much you talk to it
- You can use other model providers, but this guide defaults to Claude.
Telegram: free.
Google APIs (Gmail/Calendar): free for personal use.
Total estimated: low hundreds of dollars a month for typical personal use, dominated by how much you actually chat with the agent.
Ways to reduce costs:
- Disable the heartbeat (Part 11) — removes idle background API calls
- Use a cheaper or free model, such as the ones found on OpenRouter – I recommend checking their data policies and the providers behind these models
- Skip server backups when setting up your server (Droplet), if you’re comfortable rebuilding from this guide later
A note on the brief one-time build
Running OpenClaw is light and fits comfortably on a 4 GB Droplet. The one memory-hungry moment is building the image (Part 5), which needs something like 8 GB. The guide handles that by briefly resizing the server up for the build only (a few cents, since billing is per second), then dropping straight back to 4 GB. So you start, and stay, on the cheaper plan.
Important Caveat
This guide reflects a deployment built and tested in June 2026. OpenClaw evolves rapidly, so if you hit issues:
- Take a screenshot and explain your problem to whatever AI model you use – Claude, ChatGPT, Gemini, etc. It’ll usually help you work it out. If it’s struggling, ask it to search online before it answers.
- Check docs.openclaw.ai for updates.
- Verify CLI commands against your own installed version using --help.
Part 1: Rent the Server (DigitalOcean Droplet)
Time required: 15-20 minutes
What you’ll create: A Droplet running Ubuntu 24.04
Why DigitalOcean?
- Clean, beginner-friendly control panel, which makes a real difference if you’re not doing this every day
- Free cloud firewalls, which we’ll use as the outer of two security layers
Alternatives: You could use Hetzner, Linode, or Vultr. The commands will be the same, but the UI for creating servers differs.
Step 1.1: Create a DigitalOcean Account
Navigate to: https://www.digitalocean.com/
- Click Sign up
- Register with an email and password, or sign up with Google/GitHub
- You may be asked to complete a quick identity or anti-fraud check on first sign-up
- Add a payment method (credit card or PayPal). DigitalOcean may place a small temporary pre-authorisation charge to verify the card; this is released automatically.
Security note: Enable 2FA (two-factor authentication) in Account Settings after signing up. This protects your account if your password is compromised.
Step 1.2: About Projects
What is a project? An organizational container for your resources. DigitalOcean organizes your account (your “team”) into projects, and a default project called “first-project” is created for you automatically.
If you later want to keep “personal” and “work” resources separate, you can rename the default project or create new ones, but it’s optional. For now, you’ll work in the default project. You can see it on the left sidebar.
Step 1.3: Generate SSH Key
What is an SSH key? A cryptographic key pair that proves your identity when logging into the server. Much more secure than passwords.
The core concept: keys live on machines, and prove identity to services.
- Machines – physical/virtual computers that do things. Your personal laptop, your work laptop, the Droplet you’re about to create. Three machines.
- Services – accounts in the cloud that machines talk to. Your personal GitHub, and, separately, your DigitalOcean account.
An SSH key is how a machine proves its identity to a service (or to another machine). It comes in a pair:
- Private key – a secret file that stays on the machine, never leaves it, never gets shared or committed. Think of it as the machine’s signature.
- Public key – the matching half, which is safe to hand out freely. You paste it into a service to say “trust anything signed by the private key that matches this.” You’ll upload this to DigitalOcean, and you only need to do this once. The same SSH key can be used for multiple servers, so you can use it for other services later.
🚧 Using the terminal
For these steps, you’ll need to use a terminal.
A computer terminal is a text-based interface that allows you to interact with your operating system by typing commands instead of clicking on icons and menus. It provides direct control over the computer’s file system, software, and behind-the-scenes processes.
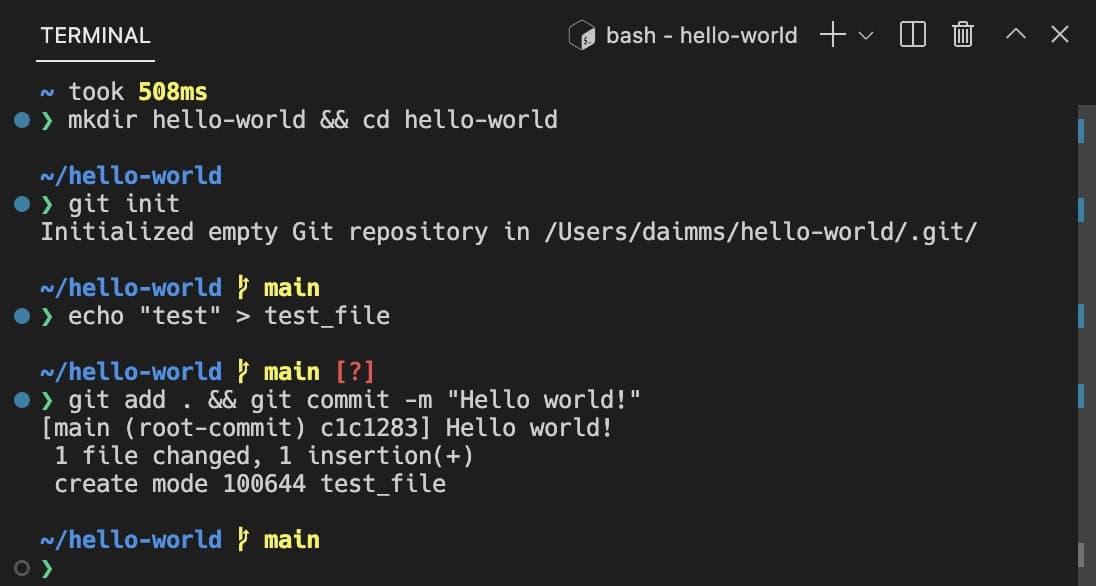
It seems scary at first, but when you get used to it, it’s actually pretty straightforward.
If you’re not familiar with what a Terminal is, do get yourself acquainted with it before following these steps.
A good way to do this is to create a small project that requires you to use the terminal. You can ask Claude or your chosen AI model how to do it, and it will tell you.
On your Mac or Linux (Windows instructions are below):
- Open a Terminal
- Mac: You can use your Terminal app by following these steps: Applications → Utilities → Terminal
- Linux: Ctrl+Alt+T
- On my Mac, I usually use VS Code – a code editor – to access the terminal.
Generate the key:
ssh-keygen -t ed25519 -C "your-email@example.com"- You’ll see:
Generating public/private ed25519 key pair.
Enter file in which to save the key (/Users/yourname/.ssh/id_ed25519):- Press Enter (accept default location)
- You’ll see:
Enter passphrase (empty for no passphrase):- Enter a passphrase and store it in a safe place – remember: you’ll need that passphrase every time you’re SSH’ing.
- You’ll see:
Your identification has been saved in /Users/yourname/.ssh/id_ed25519
Your public key has been saved in /Users/yourname/.ssh/id_ed25519.pub
The key fingerprint is:
SHA256:abc123def456... your-email@example.com- Display your public key:
cat ~/.ssh/id_ed25519.pub- You’ll see output like:
ssh-ed25519 AAAAC3NzaC1lZDI1NTE5AAAAIBcdefgh1234567890abcdefgh your-email@example.com- Copy this entire line (select with mouse, Cmd+C or Ctrl+C)
On Windows:
- Open PowerShell (not Command Prompt)
- Press Windows key
- Type “PowerShell”
- Click “Windows PowerShell”
- Generate the key:
ssh-keygen -t ed25519 -C "your-email@example.com"- Press Enter three times (default location, no passphrase)
- Display your public key:
cat ~/.ssh/id_ed25519.pub- Copy the entire output
What if ssh-keygen is not found?
Windows 10/11 includes OpenSSH by default. If it’s missing:
- Settings → Apps → Optional Features
- Click “Add a feature”
- Search for “OpenSSH Client”
- Install it
- Restart PowerShell and try again
Step 1.4: Add SSH Key to DigitalOcean
Why: you’ll attach the key on the Droplet creation page in Step 1.6, but you can pre-load it now so it’s ready:
- In the DigitalOcean Control Panel (Home), go to Settings (under Account on the left sidebar) → Security tab → you’ll see SSH keys
- Click Add SSH Key
- Paste your public key (the entire line from ssh-ed25519 to your email)
- Give it a name: my-laptop or personal-macbook
- Click Add SSH Key
You’ll see it appear in the list. (If you skip this, the Droplet creation page also lets you paste a new key inline. Either way works.)
Step 1.5: Create the server (Droplet)
Now we bring it all together: Droplet + SSH key.
- From the Control Panel (Home), click Create a Droplet under Quick Actions, right at the center of the screen
Configuration wizard:
Choose Region:
- Pick the datacenter closest to you for lower latency.
- Latency matters: your messages go Phone/laptop → channel servers → your Droplet → Model Provider API.
Choose an Image:
- Select the OS tab
- Choose Ubuntu
- Version: 24.04 (LTS – Long Term Support) x64
- Don’t pick:
- Debian (different package manager commands),
- Fedora/CentOS/Rocky (different commands), or
- Any of the otherUbuntu options.
Choose size:
- Choose the Basic plan (listed under “Shared CPU”)
- For the CPU option, Regular (standard SSD) is the cheapest and works fine. Premium AMD or Premium Intel (faster NVMe storage, newer CPUs) cost a dollar or two more if you’d like slightly quicker disk performance.
- Pick the option with 4 GB RAM / 2 vCPUs. At the time of writing, this is the $24/month tier, with 80 GB SSD and 4 TB transfer.
- Ignore the Volumes Block Storage checkbox
- You can turn on Enable Automated Backups if you’d like: this will cost you about 20% of the Droplet’s total cost. Skip it if you’re comfortable rebuilding from this guide.
Why 4 GB RAM, not less?
- OpenClaw runs comfortably on 4 GB.
- A 1-2 GB box cannot complete the image build (the compile step is memory-hungry and gets killed). 4 GB is the floor that makes the whole guide work without fighting it.
Why not 8 GB?
- Unnecessary for normal running.
- The one moment 8 GB helps is the initial image build. We handle that in Part 5 by briefly resizing for the build only (a few cents, since billing is per second) rather than paying for 8 GB month-round. So start on 4 GB.
⚠️ Important note on resizing: DigitalOcean lets you resize a Droplet up or down at any time, as long as you choose the “CPU and RAM only” resize option (which does not grow the disk). Growing the disk is a one-way door. Since we never grow the disk, you stay free to move between sizes. This matters in Part 5, no need to worry now.
Choose authentication method:
- Tick the SSH key you added in Step 1.4. (If you didn’t pre-add it, click Add SSH Key here and paste your public key now.)
- If you don’t see your key, you skipped Step 1.4. Go back and add it, then refresh this page.
Networking:
- Skip Enable IPv6. Your Droplet gets a public IPv4 address regardless, and that’s what you SSH into and what the guide uses throughout. IPv6 is harmless but it’s one more thing to reason about for zero benefit here, since nothing in this setup needs it. Off is the right default.
Monitoring:
- Skip Improved Metrics and monitoring. It does no harm, but we’re trying to keep it simple.
Additional options:
- Skip Startup Scripts (Free). This runs a script automatically at first boot to pre-configure the server. The whole point of the guide is that you do those steps by hand so you understand them, so you don't want this.
- Skip Add a worry-free Managed Database ($15.00/month). This is a paid add-on for a separate hosted database, which OpenClaw doesn’t use, and it would add $15/month on top of your Droplet for nothing.
Finalize details:
- Quantity: 1 Droplet
- Give your Droplet a name: give it a name like openclaw-host. This is just a label and doesn’t affect functionality.
- Project: leave it as your default project (“first-project”).
- Tags: skip it.
- Click Create Droplet
- You should see a notification: “Droplet successfully created”
What happens next:
- DigitalOcean provisions the server
- Installs Ubuntu 24.04
- Copies your SSH public key to the server
- Starts the server
Wait time: 30-60 seconds
- When it’s ready, the Droplet appears on your screen with its public IPv4 address. Format: 123.45.67.89. Note down the IPv4 address, as you’ll need it for SSH.
Step 1.6: Create a Firewall
What is a firewall? A filter that blocks unwanted network traffic to your server. DigitalOcean Cloud Firewalls are free.
- From the Control Panel (Home), go to Firewalls (under Networking on the left sidebar)
- Click Create Firewall
- Inbound Rules: there’s one default rule allowing SSH on TCP port 22. Leave it as is. Do not add any other inbound rules; we’ll use a second firewall (ufw) on the server itself.
- Outbound Rules: leave the defaults, which allow all outbound traffic. (Keeping outbound open matters on DigitalOcean: the browser-based console you can use to rescue a locked-out server relies on outbound access to work, so leaving this alone preserves that safety net.)
- Apply to Droplets: select the Droplet you’ve just created, openclaw-host
- Name: openclaw-firewall
- Click Create Firewall
Understanding the rule:
- Inbound: Traffic coming to your server from the internet. We allow only SSH (TCP port 22) and block everything else.
- Outbound: Traffic going from your server to the internet. We leave this fully open.
Confirm the firewall attached:
The firewall is important, so it’s worth a quick check. Go to Networking → Firewalls → openclaw-firewall → Droplets tab and confirm your Droplet is listed under the Droplets it protects. If it isn’t there, click on Add Droplets, and select the openclaw-firewall.
What you now have:
✅ A server running Ubuntu 24.04
✅ Your SSH public key installed on it
✅ A cloud firewall blocking all inbound traffic except SSH (port 22)
✅ A public IP address
Part 2: Secure the Server
Time required: 10-15 minutes
Why this matters: A server with root login and password auth is a target for bots. These steps lock it down.
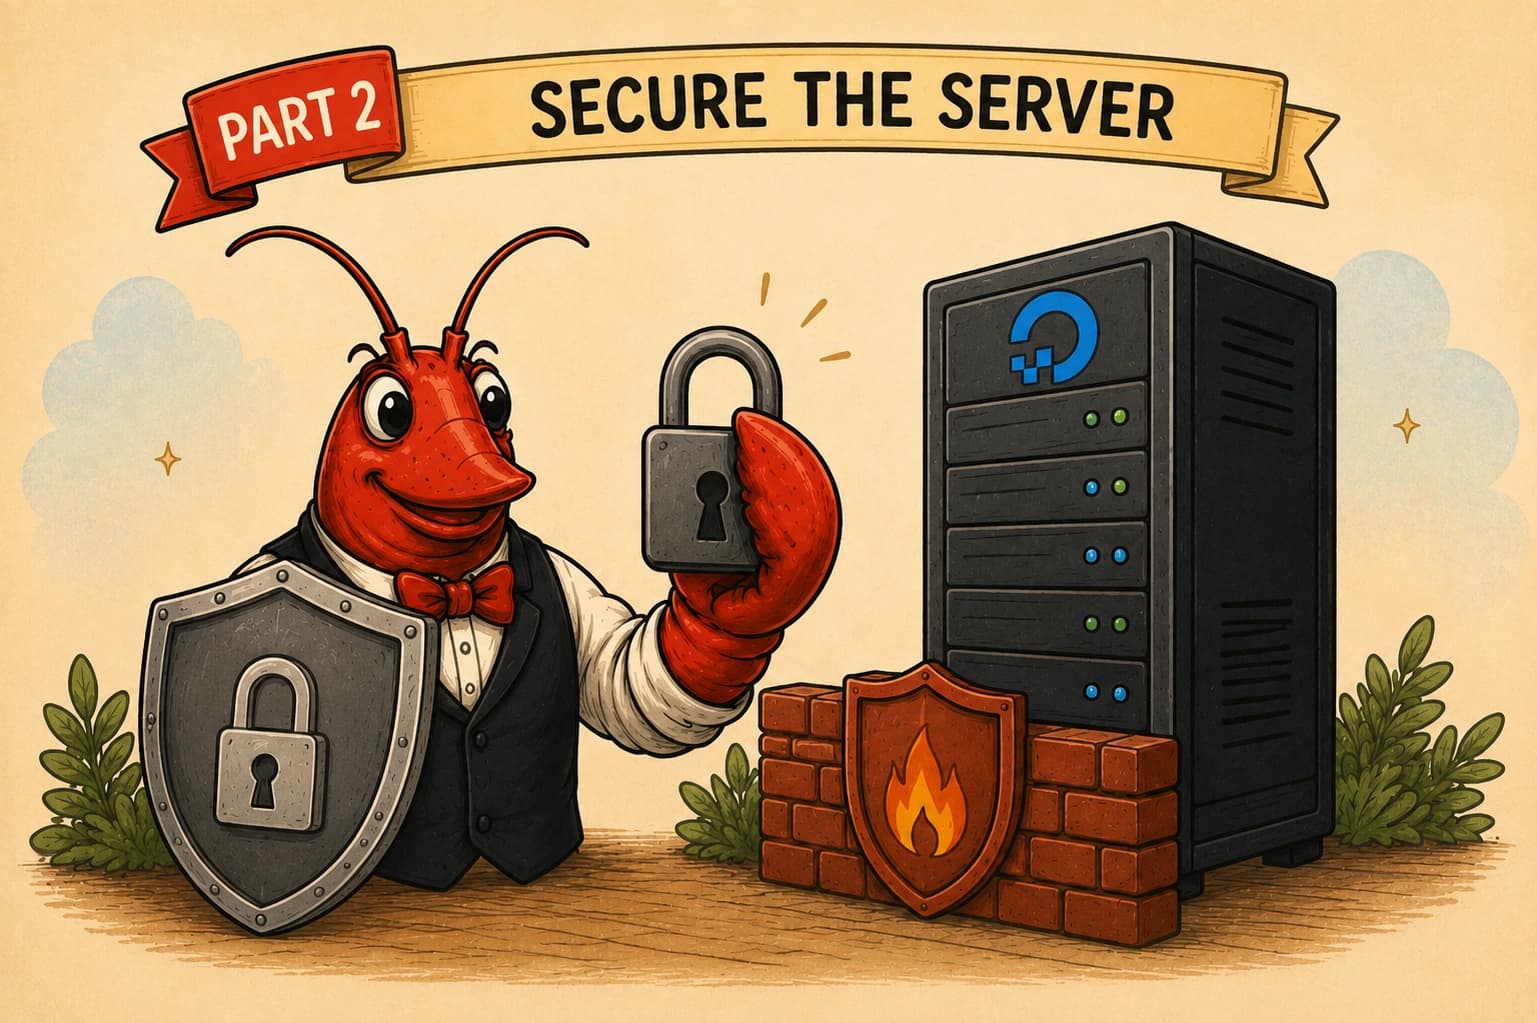
What we’ll do:
- Log in as root (temporary, one time only)
- Create your personal user account
- Give your user admin (sudo) rights
- Copy your SSH key to your user
- Disable root login
- Disable password authentication (SSH key only)
- Enable a second firewall (ufw) on the server itself
What are the potential threats:
- Bots: Constantly scanning for SSH servers with weak passwords
- Brute force: Trying thousands of passwords per second
- Root access: If root is compromised, attacker has full control
What you can do to defend yourself:
- DigitalOcean Cloud Firewall: Blocks non-SSH traffic before it reaches your server
- SSH key auth: No password to brute-force
- No root login: Can’t directly attack the all-powerful account
- Personal user + sudo: Actions are logged, requires explicit elevation
- ufw firewall: Second layer on the server itself
Step 2.1: First Login as Root
What is root? The superuser account with unlimited privileges. Dangerous to use routinely, but needed for initial setup.
On Mac or Linux:
Open Terminal and type:
ssh root@YOUR_DROPLET_IPReplace YOUR_DROPLET_IP with the actual IP address from your Droplet (e.g., ssh root@123.45.67.89).
On Windows:
Open PowerShell and type:
ssh root@YOUR_DROPLET_IPWhat happens:
- First time connecting, you’ll see:
The authenticity of host '123.45.67.89 (123.45.67.89)' can't be established.
ED25519 key fingerprint is SHA256:abcdef123456...
Are you sure you want to continue connecting (yes/no/[fingerprint])?- Type yes and press Enter
What this means: Your computer is storing the server’s fingerprint. Future connections will verify against this fingerprint to prevent man-in-the-middle attacks.
- You’ll see the below and be prompted into entering the passphrase you created previously.
Warning: Permanently added '123.45.67.89' (ED25519) to the list of known hosts.- Then you’re logged in:
Welcome to Ubuntu 24.04 LTS (GNU/Linux 6.8.0-generic x86_64)

root@openclaw-host:~#
Understanding the prompt:
- root = you’re logged in as the root user
- @openclaw-host = the server’s hostname
- ~ = current directory (~ means home directory, /root for root user)
- # = root prompt ($ would indicate regular user)
If login fails:
Error: “Connection refused”
ssh: connect to host 123.45.67.89 port 22: Connection refused- The server isn’t running yet (wait 30 more seconds)
- OR you typed the wrong IP address
- OR the firewall is misconfigured Error: “Permission denied (publickey)”
root@123.45.67.89: Permission denied (publickey).- Your SSH key wasn’t added correctly
- OR you’re on a different computer than where you generated the key
- Fix: open the Droplet → Access → Launch Droplet Console to get in via the browser, then repair your key.
ssh: connect to host 123.45.67.89 port 22: Operation timed out- You might have a local firewall blocking outbound SSH
- Check: Can you ping the server? ping 123.45.67.89
Step 2.2: Update System Packages
What we’re doing: Updating Ubuntu’s package lists and upgrading any outdated packages. Fresh servers often have security updates available.
apt-get update && apt-get upgrade -yCommand breakdown:
- apt-get update: Downloads package lists from Ubuntu’s servers
- &&: “And then” (only runs second command if first succeeds)
- apt-get upgrade -y: Installs all available updates
- y: Automatically answer “yes” to prompts
Expected output:
Hit:1 http://archive.ubuntu.com/ubuntu noble InRelease
Get:2 http://archive.ubuntu.com/ubuntu noble-updates InRelease [126 kB]
Get:3 http://security.ubuntu.com/ubuntu noble-security InRelease [126 kB]
...
Fetched 45.2 MB in 3s (15.1 MB/s)
Reading package lists... Done
...
The following packages will be upgraded:
 base-files cloud-init libc-bin libc6 libssl3 openssh-client openssh-server
8 upgraded, 0 newly installed, 0 to remove and 0 not upgraded.
Need to get 12.3 MB of archives.
After this operation, 0 B of additional disk space will be used.
...
Setting up openssh-server (1:9.6p1-3ubuntu13.5) ...
Time: 1-3 minutes depending on how many updates are available
If you see errors about “dpkg was interrupted”:
dpkg --configure -a
apt-get upgrade -y
Step 2.3: Create Your Personal User Account
What we’re doing: Creating a normal user account that you’ll use instead of root.
Choose a username:
- Lowercase letters only
- No spaces
- Short and memorable
- Examples: jack, jsmith, dev
Don’t use:
- root (already exists)
- admin (commonly targeted by bots)
- Your full name with spaces
Throughout this guide, replace yourname with your chosen username.
adduser yournameReplacing yourname with the actual username you want to use.
Expected interaction:
- Set password:
New password:Type a strong password (you’ll need this for sudo later)
- At least 12 characters
- Mix of uppercase, lowercase, numbers, symbols
- Don’t reuse passwords from other services
- Confirm password:
Retype new password:Type the same password again
- Full name:
Enter the new value, or press ENTER for the default
 Full Name []:
You can just press Enter (skip)
Questions 4-7 such as Room number, work phone, home phone, other can all be skipped. Just press Enter for all (skip).
- Confirmation:
Is the information correct? [Y/n]Type Y and press Enter
Expected final output:
Adding user `yourname' ...
Adding new group `yourname' (1000) ...
Adding new user `yourname' (1000) with group `yourname' ...
Creating home directory `/home/yourname' ...
Copying files from `/etc/skel' ...
New password:
Retype new password:
passwd: password updated successfully
...
Is the information correct? [Y/n] Y
What was created:
- User account: yourname
- Home directory: /home/yourname
- Primary group: yourname (same as username)
- User ID (UID): 1000 (first non-system user)
Why the UID matters later: Because this is the first user created on the box, it gets UID 1000. OpenClaw’s container also runs as UID 1000. That alignment is what makes the data-directory permissions in Part 4 work cleanly, so don’t skip creating this user or create extra users before it.
Step 2.4: Grant Admin Rights (sudo)
What is sudo? A command that lets regular users run commands as root when needed. Safer than staying logged in as root.
Example: sudo apt-get install package runs apt-get install package with root privileges.
usermod -aG sudo yournameCommand breakdown:
- usermod: Modify a user account
- aG sudo: Append the
sudogroup to the user’s groups - yourname: The user to modify
Expected output: None (silent success)
Verify it worked:
groups yournameExpected output:
yourname : yourname sudoYou should see sudo in the list.
What this enables:
- When logged in as yourname, you can run sudo command to execute command as root
- System will ask for your password (not root’s password)
- Actions are logged in /var/log/auth.log for auditing
Step 2.5: Copy SSH Key to Your User
What we’re doing: Copying the SSH key from root’s account to your user’s account, so you can log in as your user.
mkdir -p /home/yourname/.ssh
cp ~/.ssh/authorized_keys /home/yourname/.ssh/
chown -R yourname:yourname /home/yourname/.ssh
chmod 700 /home/yourname/.ssh
chmod 600 /home/yourname/.ssh/authorized_keys
Replace yourname with your actual username (do this for all commands).
Command breakdown:
- mkdir -p /home/yourname/.ssh
- Create the
.sshdirectory in your user’s home p: Don’t error if it already exists
- Create the
- cp ~/.ssh/authorized_keys /home/yourname/.ssh/
- Copy the authorized keys file from root to your user
- ~/.ssh/authorized_keys = /root/.ssh/authorized_keys (root’s home)
- chown -R yourname:yourname /home/yourname/.ssh
- Change ownership of .ssh directory and contents to your user
- R: Recursive (directory and files inside)
- yourname:yourname: user:group format
- chmod 700 /home/yourname/.ssh
- Set permissions on .ssh directory
- 700 = owner can read/write/execute, nobody else can access
- SSH requires this for security
- chmod 600 /home/yourname/.ssh/authorized_keys
- Set permissions on authorized_keys file
- 600 = owner can read/write, nobody else can access
- SSH requires this for security
Expected output: None (silent success)
Verify it worked:
ls -la /home/yourname/.ssh/Expected output:
total 12
drwx------ 2 yourname yourname 4096 May 15 10:30 .
drwxr-x--- 3 yourname yourname 4096 May 15 10:25 ..
-rw------- 1 yourname yourname 567 May 15 10:30 authorized_keys
Key things to check:
- .ssh directory permissions: drwx
------(700) - authorized_keys permissions: rw------- (600)
- Owner and group: both yourname
Why permissions matter:
- SSH refuses to use keys if permissions are too open
- This prevents other users on the server from reading your private keys
- If you see drwxr-xr-x (755) or similar, SSH will reject the key
Step 2.6: Test New User Login
⚠️ Important: Do NOT close your current Terminal yet
You’re about to lock out root login. If the new user login doesn’t work, you’ll be stuck. Test it first.
You’ll need to open a SECOND terminal window (leave the first one open as root).
On Mac/Linux - Second Terminal:
ssh yourname@YOUR_DROPLET_IPOn Windows - Second PowerShell:
ssh yourname@YOUR_DROPLET_IPExpected result:
Welcome to Ubuntu 24.04 LTS (GNU/Linux 6.8.0-generic x86_64)

yourname@openclaw-host:~$
Notice the prompt changed:
- yourname instead of root
- $ instead of # (indicating regular user)
Test sudo works:
sudo whoamiYou’ll be prompted for your password (the one you set in Step 2.3):
[sudo] password for yourname:Type your password and press Enter.
Expected output:
rootThis confirms sudo is working (you ran whoami as root, which returned “root”).
If this all worked, you can proceed to lock down root login
Keep this second terminal open as your user. Use it for all future commands.
If login failed:
Error: “Permission denied (publickey)”
- SSH key wasn’t copied correctly
- In the root terminal, re-run Step 2.5
- Check permissions with ls -la /home/yourname/.ssh/
- If you get Error: “yourname is not in the sudoers file”
- sudo wasn’t granted correctly
- In the root terminal, re-run Step 2.4
- Verify with groups yourname - should show sudo
- If you can log in but sudo doesn’t work:
- The user wasn’t added to sudo group correctly
- In the root terminal: usermod -aG sudo yourname
- Logout and back in for group changes to take effect
Step 2.7: Lock Down SSH
What we’re doing now:
- Disable root login (must use personal user)
- Disable password authentication (must use SSH key)
- Restart SSH service to apply changes
Why this is safe: You’ve already tested that your user account works with SSH keys and sudo.
Switch to your ROOT terminal (the first one) for these commands:
sed -i 's/^#*PermitRootLogin.*/PermitRootLogin no/' /etc/ssh/sshd_config
sed -i 's/^#*PasswordAuthentication.*/PasswordAuthentication no/' /etc/ssh/sshd_config
systemctl restart ssh
Command breakdown:
- First sed command:
- Edit SSH config file in-place
- Find line starting with PermitRootLogin (possibly commented with #)
- Replace entire line with PermitRootLogin no
- This blocks root login via SSH
- Second sed command:
- Find line starting with PasswordAuthentication
- Replace with PasswordAuthentication no
- This disables password login (SSH keys only)
- systemctl restart ssh:
- Restart SSH service to load new config
- Existing connections stay open (your terminals won’t disconnect)
Expected output: None (silent success)
Verify the changes:
grep "^PermitRootLogin" /etc/ssh/sshd_config
grep "^PasswordAuthentication" /etc/ssh/sshd_config
Expected output:
PermitRootLogin no
PasswordAuthentication no
What these settings do:
- PermitRootLogin no:
- ssh root@YOUR_DROPLET_IP will now fail
- Bots scanning for root access will be blocked
- You must SSH as your personal user, then use sudo
- PasswordAuthentication no:
- Password login is disabled
- Only SSH key authentication works
- Brute-force password attacks are ineffective
Your root terminal will stay connected (existing sessions aren’t affected), but you won’t be able to log in as root again.
Close the root terminal - you won’t need it anymore.
From now on, use only your user terminal.
Step 2.8: Enable Server-Side Firewall (ufw)
What is ufw? Ubuntu’s “Uncomplicated Firewall” - a simpler interface to iptables.
Why a second firewall? Defense in depth:
- DigitalOcean Cloud Firewall: Blocks traffic before it reaches your server (first layer)
- ufw: Blocks traffic on the server itself (second layer)
In your USER terminal (not root):
sudo ufw allow 22/tcp
sudo ufw --force enable
Command breakdown:
- sudo ufw allow 22/tcp
- Allow incoming TCP connections on port 22 (SSH)
- Without this, you’ll lock yourself out when you enable the firewall
- sudo ufw --force enable
- Enable the firewall
- -force: Don’t ask for confirmation (we already allowed SSH)
Expected output:
Rule updated
Rule updated (v6)
Firewall is active and enabled on system startup
Verify it’s running:
sudo ufw status verboseExpected output:
Status: active
Logging: on (low)
Default: deny (incoming), allow (outgoing), disabled (routed)
New profiles: skip

To Action From
-- ------ ----
22/tcp ALLOW IN Anywhere
22/tcp (v6) ALLOW IN Anywhere (v6)
What this means:
- deny (incoming): Block all incoming traffic by default
- allow (outgoing): Allow all outgoing traffic (so your server can download packages, call APIs, etc.)
- 22/tcp ALLOW IN: Except SSH (port 22), which is explicitly allowed
Note on the gateway port: OpenClaw’s Control UI listens on port 18789, but we deliberately do not open it in either firewall. You’ll reach the Control UI through an SSH tunnel in a later Part, which is far safer than exposing it to the internet. So leave the firewalls as they are.
Test that SSH still works:
exitThen reconnect:
ssh yourname@YOUR_DROPLET_IPIf you can log back in, the firewall is configured correctly.
What you now have:
✅ Personal user account with sudo privileges
✅ SSH key authentication (no passwords)
✅ Root login disabled
✅ Two firewalls active (DigitalOcean + ufw)
Common mistakes at this stage:
❌ Forgot to allow SSH before enabling ufw
- You’ll lock yourself out
- Fix: Use the Droplet Console in the Control Panel (Access → Launch Droplet Console) to access the server and run sudo ufw allow 22/tcp
❌ Tested new user in same terminal as root
- You won’t catch SSH key issues until after locking down
- Always test in a separate terminal
❌ Disabled root but didn’t verify sudo works
- You lose admin access
Fix: Use the Recovery Console in the Control Panel to re-enable access, fix sudo, and try again
Part 3: Install Docker
Time required: 5-10 minutes
What you’ll install: Docker Engine + Docker Compose v5
What is Docker?
Containerization platform that runs applications in isolated environments. OpenClaw runs inside a Docker container.
Why Docker?
- Isolated environment (OpenClaw can’t mess with your system files)
- Easy updates (rebuild image, restart container)
- Reproducible (same environment on any server)
- Dependency management (all dependencies baked into the image)
Step 3.1: Install Prerequisites
What we’re installing:
- git: Version control (needed to download OpenClaw’s source)
- curl: HTTP client (needed for Docker’s install script)
- ca-certificates: Trusted root certificates (needed for HTTPS)
sudo apt-get update
sudo apt-get install -y git curl ca-certificates
Expected output:
Hit:1 http://archive.ubuntu.com/ubuntu noble InRelease
...
Reading package lists... Done
Building dependency tree... Done
Reading state information... Done
ca-certificates is already the newest version (20240203).
git is already the newest version (1:2.43.0-1ubuntu7).
curl is already the newest version (8.5.0-2ubuntu10.1).
0 upgraded, 0 newly installed, 0 to remove and 0 not upgraded.
Most of these are usually pre-installed on Ubuntu 24.04. That’s fine.
Step 3.2: Install Docker
Official Docker installation script: Detects your OS and installs Docker automatically.
curl -fsSL https://get.docker.com | sudo shCommand breakdown:
- curl -fsSL: Download the script
- f: Fail silently on HTTP errors
- s: Silent mode (no progress bar)
- S: Show errors even in silent mode
- L: Follow redirects
- | sudo sh: Pipe the script to sh and run with sudo
Expected output (the version will likely have changed):
# Executing docker install script, commit: 1234abcd
+ sh -c apt-get update -qq >/dev/null
+ sh -c DEBIAN_FRONTEND=noninteractive apt-get install -y -qq apt-transport-https ca-certificates curl >/dev/null
+ sh -c install -m 0755 -d /etc/apt/keyrings
+ sh -c curl -fsSL "https://download.docker.com/linux/ubuntu/gpg" -o /etc/apt/keyrings/docker.asc
+ sh -c chmod a+r /etc/apt/keyrings/docker.asc
+ sh -c echo "deb [arch=amd64 signed-by=/etc/apt/keyrings/docker.asc] https://download.docker.com/linux/ubuntu noble stable" > /etc/apt/sources.list.d/docker.list
+ sh -c apt-get update -qq >/dev/null
+ sh -c DEBIAN_FRONTEND=noninteractive apt-get install -y -qq docker-ce docker-ce-cli containerd.io docker-compose-plugin docker-ce-rootless-extras docker-buildx-plugin >/dev/null
+ sh -c docker version
Client: Docker Engine - Community
 Version: 29.x.x
 ...

Server: Docker Engine - Community
 Engine:
 Version: 29.x.x
 ...
Time: 2-3 minutes
What was installed:
- docker-ce: Docker Community Edition (the core Docker daemon)
- docker-ce-cli: Docker command-line interface
- containerd.io: Container runtime
- docker-compose-plugin: Docker Compose V5 (bundled with Docker)
- docker-buildx-plugin: Enhanced build capabilities
Verify Docker installed:
docker --versionExpected output:
Docker version 29.x.x, build abcdef0The exact version number will differ depending on when you install; any recent version is fine. The point is that the command runs and reports a version.
Verify Docker Compose installed:
docker compose versionExpected output (the version number will likely have changed):
Docker Compose version v5.x.xNote: It’s docker compose (two words), not docker-compose. Docker Compose V5 is a plugin.
Step 3.3: Add Your User to Docker Group
What we’re doing: Allowing your user to run Docker commands without sudo.
By default: Docker daemon runs as root, requires sudo for every command.
After this step: Your user can run docker commands directly.
sudo usermod -aG docker $USERCommand breakdown:
- usermod -aG docker $USER: Add current user ($USER) to the docker group
- This takes effect on NEXT login (not immediate)
Expected output: None (silent success)
Make the change take effect:
exitThen log back in:
ssh yourname@YOUR_DROPLET_IPVerify it worked:
docker psExpected output:
CONTAINER ID IMAGE COMMAND CREATED STATUS PORTS NAMESAn empty table (no containers running yet) is correct. The point is that the command worked without sudo.
If you see “permission denied”:
Got permission denied while trying to connect to the Docker daemon socket at unix:///var/run/docker.sockYou either:
- Didn’t log out and back in (group membership doesn’t update until next login)
- The usermod command failed
Fix:
# Check which groups you're in
groups

# Should show: yourname sudo docker
# If "docker" is missing:
sudo usermod -aG docker $USER
exit
# Then SSH back in
Step 3.4: Test Docker
Run a test container to verify everything works:
docker run hello-worldExpected output:
Unable to find image 'hello-world:latest' locally
latest: Pulling from library/hello-world
c1ec31eb5944: Pull complete
Digest: sha256:d58e752213a51785838f9eed2b7a498ffa1cb3aa7f946dda11af39286c3db9a9
Status: Downloaded newer image for hello-world:latest

Hello from Docker!
This message shows that your installation appears to be working correctly.

To generate this message, Docker took the following steps:
 1. The Docker client contacted the Docker daemon.
 2. The Docker daemon pulled the "hello-world" image from the Docker Hub.
 3. The Docker daemon created a new container from that image which runs the
 executable that produces the output you are currently reading.
 4. The Docker daemon streamed that output to the Docker client, which sent it
 to your terminal.
What this tested:
- ✅ Docker daemon is running
- ✅ Docker client can communicate with daemon
- ✅ Docker can pull images from Docker Hub
- ✅ Docker can create and run containers
- ✅ Your user has permission to use Docker
Clean up the test:
docker rmi hello-worldThis removes the hello-world image (we don’t need it).
If you get an error such as the one below:
Error response from daemon: conflict: unable to delete hello-world:latest (must be forced) - container cefdd67f8d0d is using its referenced image 96498ffd522eThis is because when docker run hello-world finished, it left behind a stopped container (the run created a container, the container printed the message and exited, but the container record still exists). You can’t delete the image while a container, even a stopped one, still references it.
You can just force it in one go:
docker rmi -f hello-worldExpected output:
Untagged: hello-world:latestWhat you now have:
✅ Docker Engine installed and running
✅ Docker Compose installed
✅ Your user can run Docker commands without sudo
✅ Docker verified working with test container
What’s next?
The full guide is published as four different articles:
- Setting up your server (Intro → Part 3)
- Installing OpenClaw (Part 4 → Part 6) - link
- Configuring your OpenClaw (Part 7 → Part 10) - link
- Customizing your first agent to your needs (Part 11 → end) - link
The next article in our guide will cover how to install your OpenClaw.
Getting help
The easiest way to solve any problem is to take a screenshot and explain your problem to whatever AI model you use – Claude, ChatGPT, Gemini, etc. It will help you solve your problem.
Helpful resources:
- OpenClaw docs: docs.openclaw.ai
- GitHub issues: github.com/openclaw/openclaw/issues
- OpenClaw Discord: via the project’s site/repo
A quick disclaimer
- This is a write-up of what worked for me, offered with no warranties, follow it at your own risk.
- It’s not a security guarantee, and keeping your server secure is your responsibility.
- Costs are real and can change, so watch your own billing (a cloud server bills until you destroy it).
- Referenced tools and services belong to their owners and change over time; this reflects how things worked when written.