Part 4 of 4
Customizing your first agent
Giving the agent useful context, memory, routines, and boundaries around a problem you actually have.
The full guide is published as four different articles:
- Setting up your server (Intro → Part 3) - link
- Installing OpenClaw (Part 4 → Part 6) - link
- Configuring your OpenClaw (Part 7 → Part 10) - link
- Customizing your first agent to your needs (Part 11 → end)
This last piece is where Arnold stops being a generic assistant and becomes an actual coach, one who knows your program, remembers last week, and pushes when you’re recovered enough to take it.
Part 11: Critical Cost Control
Time required: 5 minutes
What you’ll do: Turn off the one feature that burns money unnecessarily.
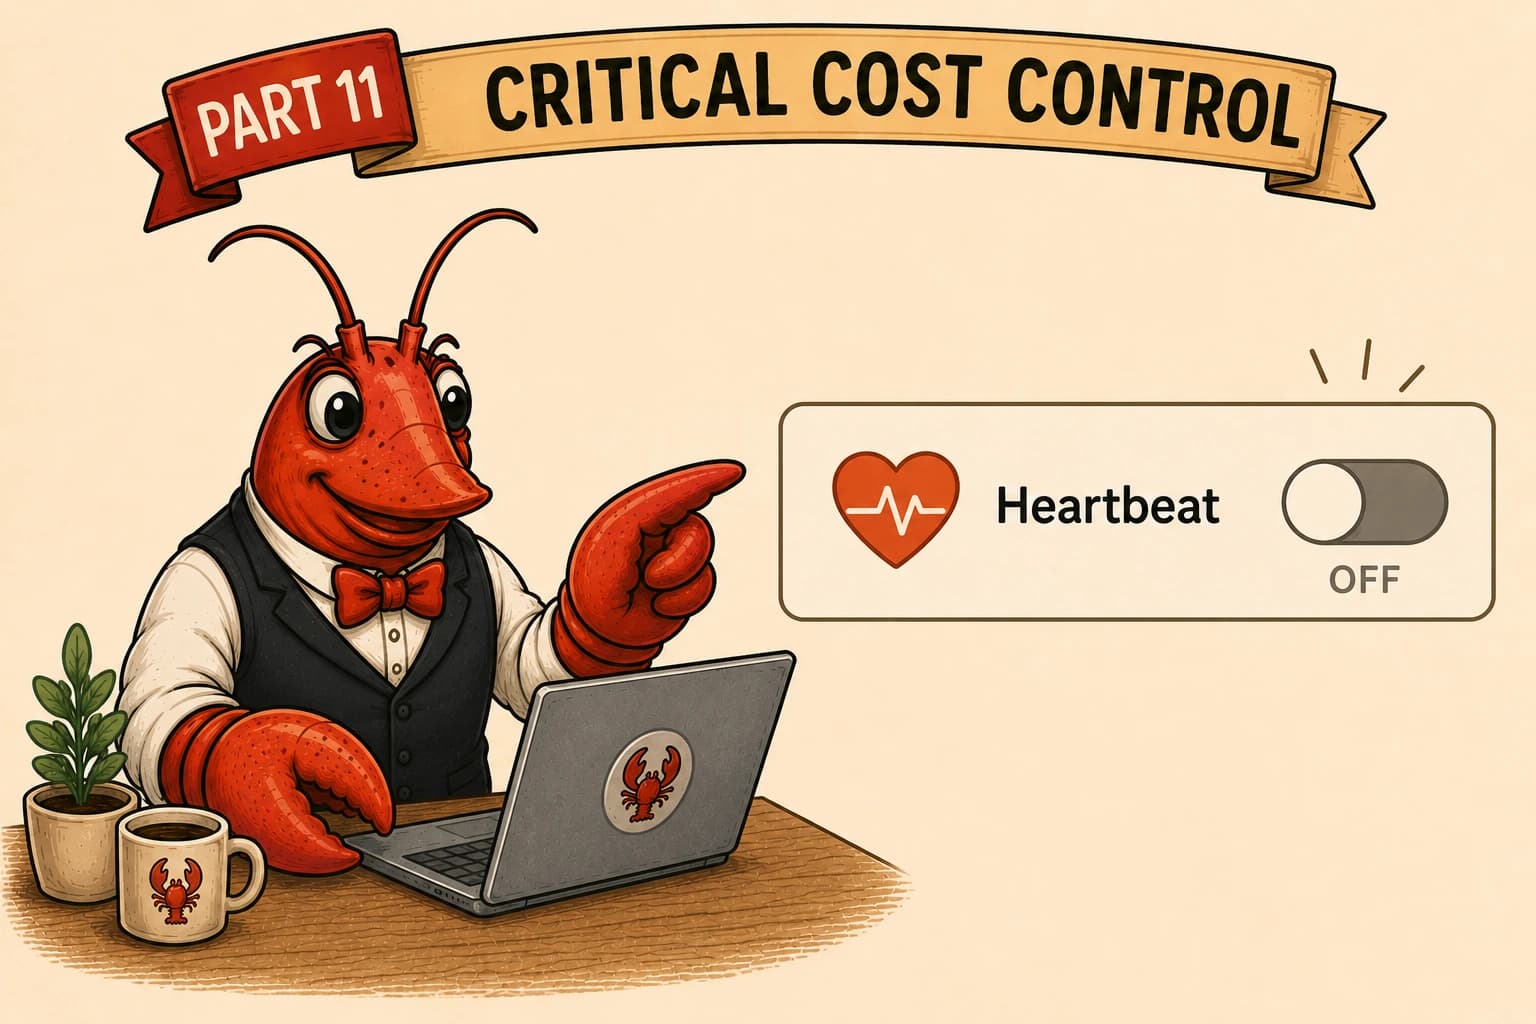
Why this matters
By default, OpenClaw runs a heartbeat: a scheduled agent turn (every 30 minutes out of the box) that wakes the model to check if anything needs attention. Each run calls the Anthropic API and costs tokens, whether or not there’s anything to do.
That background polling is oftentimes pure waste. We disable it, then make sure your account has a hard spending ceiling so nothing can surprise you.
Step 11.1: Disable the heartbeat
You can follow the steps set out in the image above, using the OpenClaw Control UI, or you can use the terminal by following the steps below.
Set the heartbeat interval to 0m, which disables it:
cd ~/openclaw
docker compose exec openclaw-gateway node dist/index.js config set --batch-json '[{"path":"agents.defaults.heartbeat.every","value":"0m"}]'
Expected output:
Updated agents.defaults.heartbeat.every. Restart the gateway to apply.The setting is agents.defaults.heartbeat.every, not agents.defaults.heartbeat. The value lives on the .every key; setting the parent on its own won’t work. Restart to apply:
docker compose restart openclaw-gatewayNow verify it’s actually off, by asking the running gateway, not just reading back the config you wrote:
docker compose exec openclaw-gateway node dist/index.js status | grep -i heartbeatYou want:
Heartbeat │ disabled (main)That line is the gateway confirming the heartbeat won’t run. (Checking via status matters: there are known cases where the config is written but the heartbeat keeps running, so confirm at the source of truth rather than trusting the “Updated” message.)
If you’d rather keep a heartbeat at a slower cadence instead of disabling it, set .every to “6h”, “12h”, or “24h” the same way. But for a coach you talk to on demand, off is the sensible default.
What you now have
✅ Heartbeat disabled, no idle API calls running in the background
Part 12: Security Hardening
Time required: 10 min (plus ~45-60 min for the egress firewall in 12.3)
What you’ll do: Understand what is and isn’t isolated, run OpenClaw’s built-in security audit, and lock down the gateway’s outbound network access.
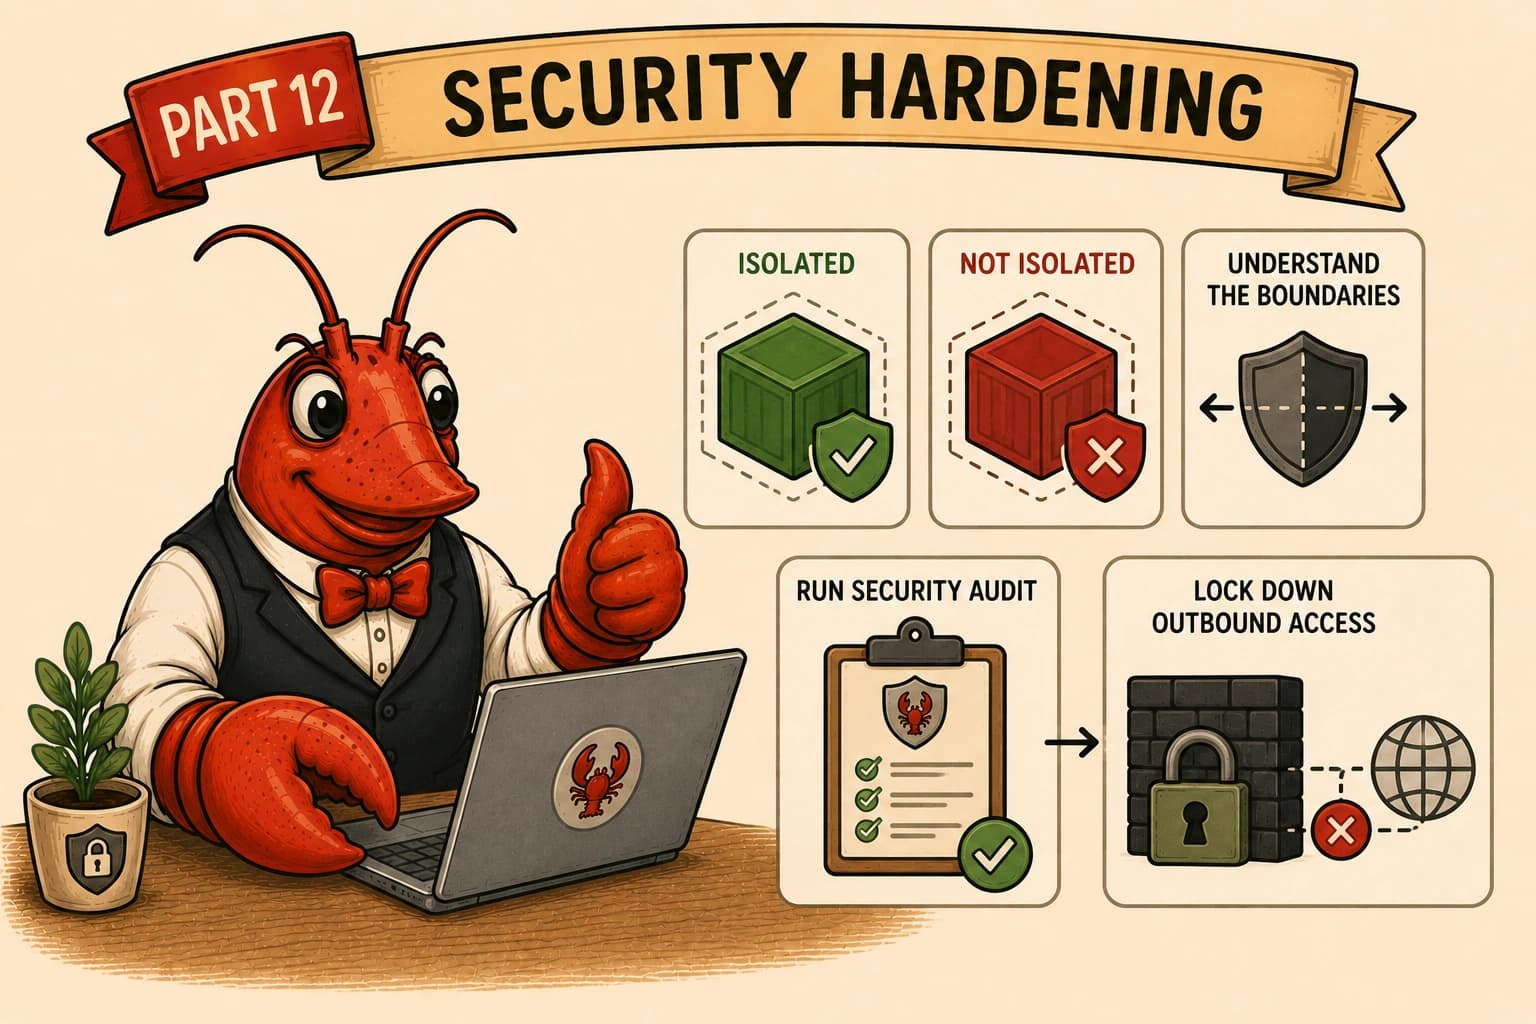
The security model
The agent’s tools run inside the gateway container. The container is the isolation boundary, not a per-tool sandbox. Anything the gateway container can see, a tool (or a misbehaving skill) can potentially see.
Your real protections are therefore: the container boundary itself, which skills you enable (Part 7, keep it minimal), the Telegram allowlist (Part 8, only you can issue instructions), loopback-only gateway access over the SSH tunnel (Part 6), and the egress firewall below (limits where the container can send data).
This part strengthens the last two: it confirms the audit is clean and then restricts outbound network access so a compromised skill or a prompt-injection can’t quietly ship your data somewhere.
Step 12.1: Understand the filesystem boundary
What actually keeps your data safe here:
- The container is the boundary. The gateway runs as an unprivileged user (UID 1000) in its own container; it does not have your host’s home directory, only the volumes you mounted (~/.openclaw and the workspace). Your host system files are not in the container.
- Mount only what’s needed. You’ve mounted exactly the config and workspace directories, nothing else. Don’t add broad host mounts (like mounting
/or your home directory) into the container. - Skills are the real attack surface. A malicious or careless skill runs with the gateway’s access. This is why Part 7’s minimal posture matters: every enabled skill is something you’re trusting. Enable only what you use.
Step 12.2: Run the built-in security audit
OpenClaw ships a security audit that inspects your configuration and environment for common mistakes, things like an exposed gateway bind, weak file permissions, or an open DM policy.
cd ~/openclaw
docker compose exec openclaw-gateway node dist/index.js security audit
The audit reports findings by severity:
- Critical — fix immediately (e.g. gateway exposed on 0.0.0.0 without a token).
- Warn — fix soon (e.g. file permissions too loose).
- Info — no action needed.
Copy the output and paste it into the chat of your favorite model provider, and it will help you understand and fix the issues.
Some issues can be auto-fixed (file permissions, group policy) by adding --fix:
docker compose exec openclaw-gateway node dist/index.js security audit --fixCritical findings like an exposed port generally need a manual fix; the audit tells you what.
One subtlety worth knowing: OpenClaw auto-approves connections from localhost. That’s exactly why the SSH-tunnel access in Part 6 works without a pairing prompt, and it’s safe for a tunnel. But it’s also why you must never put the gateway behind an unauthenticated reverse proxy: the gateway would see proxied requests as trusted localhost traffic.
Step 12.3: Restrict outbound network access (egress firewall)
What you’ll do: Restrict the gateway container’s outbound access to an allowlist of domains, resolved dynamically at connection time.
Why this matters: without egress control, a compromised skill or a prompt injection could send your data to any domain on the internet. This is your primary containment layer for outbound data, if you want to have one.
What is this doing? The egress firewall allows a defined set of domains and blocks everything else.
How it works (and why this design): iptables can only filter by IP, not domain. But modern services (Google especially) rotate IPs constantly and host subdomains on entirely different ranges. A firewall built from IPs resolved once at setup silently breaks days later, and a “wildcard” resolved at setup time does NOT cover subdomains.
The fix: dnsmasq runs on the host as the container’s DNS resolver. Every time the container resolves an allowlisted domain, dnsmasq injects the returned IPs into an ipset (a kernel IP list) that the firewall matches against. The IP the firewall allows is, by construction, the IP the container just received from DNS, so it can never go stale. Each dnsmasq entry automatically covers the domain and all its subdomains.
Enforcement point: the rules hook into Docker’s DOCKER-USER chain, not OUTPUT. Docker provides DOCKER-USER specifically for custom rules on container traffic. If OUTPUT looks empty, that’s expected, don’t look there.
Fail-closed by design: if anything inside the container bypasses dnsmasq (a hardcoded resolver, or DNS-over-HTTPS), the IPs it receives never enter the ipset, so the connection is dropped. The safe failure mode.
Step 12.3a: Enable ip6tables in Docker daemon
Docker doesn’t manage IPv6 firewall rules by default. Enable it:
sudo tee /etc/docker/daemon.json <<EOF
{
 "ip6tables": true
}
EOF
Restart Docker (this briefly stops your containers):
sudo systemctl restart docker
sleep 5
docker compose -f ~/openclaw/docker-compose.yml up -d
Verify the IPv6 DOCKER-USER chain now exists:
sudo ip6tables -L DOCKER-USER -n -vExpected: Chain DOCKER-USER (1 references), even if empty, the chain must exist before the next steps.
Step 12.3b: Find your Docker bridge gateway IP
dnsmasq listens on the host side of your compose network. Find that IP:
docker network inspect $(docker inspect openclaw-openclaw-gateway-1 --format '{{range $k, $v := .NetworkSettings.Networks}}{{$k}}{{end}}') --format 'Subnet: {{(index .IPAM.Config 0).Subnet}} | Gateway: {{(index .IPAM.Config 0).Gateway}}'Example output:
Subnet: 172.18.0.0/16 | Gateway: 172.18.0.1Note the Gateway value. Everywhere below, replace YOUR_BRIDGE_IP with it (e.g. `172.18.0.1`).
Step 12.3c: Install packages
sudo apt-get update
sudo apt-get install -y dnsmasq ipset iptables-persistent netfilter-persistent
During installation, dialogs appear:
- “Save current IPv4 rules?” → Yes
- “Save current IPv6 rules?” → Yes
- “Save current ipsets?” → Yes (harmless either way, the set doesn’t exist yet)
If dnsmasq fails to start during install (”Could not execute systemctl”), ignore it. It tried to bind port 53 on all interfaces and clashed with Ubuntu’s systemd-resolved. The config in the next step binds it only to the bridge IP, which resolves the conflict.
Step 12.3d: Configure dnsmasq
Create the config (replace YOUR_BRIDGE_IP):
sudo nano /etc/dnsmasq.d/openclaw.confContents:
# Bind only to the Docker bridge — avoids clashing with systemd-resolved
bind-dynamic
listen-address=YOUR_BRIDGE_IP

# Upstream resolvers
no-resolv
server=1.1.1.1
server=8.8.8.8

# === Allowlist: one line per domain. ===
# Each entry covers the domain AND all its subdomains.
ipset=/api.anthropic.com/openclaw-allow
ipset=/api.telegram.org/openclaw-allow

# Google APIs — explicit subdomains, deliberately NOT a blanket googleapis.com:
# that would also open storage.googleapis.com (arbitrary cloud buckets = a
# data-exfiltration path). List only what you use.
ipset=/oauth2.googleapis.com/openclaw-allow
ipset=/gmail.googleapis.com/openclaw-allow
ipset=/calendar.googleapis.com/openclaw-allow
ipset=/www.googleapis.com/openclaw-allow
ipset=/people.googleapis.com/openclaw-allow

# Package managers (skills/tools may need these)
ipset=/npmjs.org/openclaw-allow
ipset=/pythonhosted.org/openclaw-allow
ipset=/pypi.org/openclaw-allow

# GitHub
ipset=/github.com/openclaw-allow
ipset=/githubusercontent.com/openclaw-allow

# Docker Hub (image pulls)
ipset=/registry-1.docker.io/openclaw-allow
ipset=/auth.docker.io/openclaw-allow
ipset=/production.cloudflare.docker.com/openclaw-allow

# Debian packages
ipset=/deb.debian.org/openclaw-allow
ipset=/security.debian.org/openclaw-allow

# Add your own integrations below, one per line, e.g.:
# ipset=/api.elevenlabs.io/openclaw-allow
Save (Ctrl+O, Enter) and exit (Ctrl+X).
Make dnsmasq start after Docker, the bridge interface must exist before dnsmasq binds it at boot:
sudo systemctl edit dnsmasqIn the editor, add these lines in the top section (the [Unit] header must be present, above the “lines below this comment will be discarded” marker):
[Unit]
After=docker.service
Wants=docker.service
Save, exit, then:
sudo systemctl restart dnsmasq
sudo systemctl status dnsmasq --no-pager
Expected: active (running). (A “Failed to set DNS configuration: Link lo is loopback device” log line is harmless, that’s dnsmasq trying to register as the host’s resolver, which we don’t want anyway.)
Step 12.3e: Create the ipset and verify injection
sudo ipset create openclaw-allow hash:ip timeout 3600The 3600s timeout means entries auto-expire; dnsmasq re-adds them on every resolution, so stale IPs prune themselves.
Verify the core mechanism:
dig +short api.anthropic.com @YOUR_BRIDGE_IP
sudo ipset list openclaw-allow
The IPs dig returns must appear as members of the set. If they do, the dnsmasq→ipset pipeline works.
Step 12.3f: Create the firewall chains
Domains are handled by dnsmasq, so the firewall only needs static structure. Open a fresh empty file in nano:
nano ~/openclaw/setup-egress-chains.shNow paste this into nano:
#!/bin/bash
set -euo pipefail

CHAIN_NAME="OPENCLAW_EGRESS"
CHAIN_NAME6="OPENCLAW_EGRESS6"
IPSET_NAME="openclaw-allow"

echo "==> Setting up OpenClaw egress firewall chains (IPv4 + IPv6)..."

# Ensure the ipset exists (dnsmasq fills it at DNS-resolution time)
sudo ipset create "$IPSET_NAME" hash:ip timeout 3600 -exist

# --- IPv4 chain ---
if ! sudo iptables -L "$CHAIN_NAME" -n >/dev/null 2>&1; then
 sudo iptables -N "$CHAIN_NAME"
fi
sudo iptables -F "$CHAIN_NAME"

# Loopback and private networks (Docker internal traffic)
sudo iptables -A "$CHAIN_NAME" -d 127.0.0.0/8 -j ACCEPT
sudo iptables -A "$CHAIN_NAME" -d 172.16.0.0/12 -j ACCEPT
sudo iptables -A "$CHAIN_NAME" -d 10.0.0.0/8 -j ACCEPT

# Allow anything dnsmasq has resolved into the ipset
sudo iptables -A "$CHAIN_NAME" -m set --match-set "$IPSET_NAME" dst -j ACCEPT

# Log and drop everything else
sudo iptables -A "$CHAIN_NAME" -j LOG --log-prefix "OPENCLAW_EGRESS_DROP: " --log-level 4
sudo iptables -A "$CHAIN_NAME" -j DROP

# --- IPv6 chain (fail-closed: containers normally have no IPv6 egress) ---
if ! sudo ip6tables -L "$CHAIN_NAME6" -n >/dev/null 2>&1; then
 sudo ip6tables -N "$CHAIN_NAME6"
fi
sudo ip6tables -F "$CHAIN_NAME6"
sudo ip6tables -A "$CHAIN_NAME6" -p ipv6-icmp -j ACCEPT
sudo ip6tables -A "$CHAIN_NAME6" -d ::1 -j ACCEPT
sudo ip6tables -A "$CHAIN_NAME6" -d fc00::/7 -j ACCEPT
sudo ip6tables -A "$CHAIN_NAME6" -d fe80::/10 -j ACCEPT
sudo ip6tables -A "$CHAIN_NAME6" -j LOG --log-prefix "OPENCLAW_EGRESS6_DROP: " --log-level 4
sudo ip6tables -A "$CHAIN_NAME6" -j DROP

# Hook into DOCKER-USER chains
if ! sudo iptables -L DOCKER-USER -n | grep -q "$CHAIN_NAME"; then
 sudo iptables -I DOCKER-USER -s 172.16.0.0/12 -j "$CHAIN_NAME"
fi
if ! sudo ip6tables -L DOCKER-USER -n | grep -q "$CHAIN_NAME6"; then
 sudo ip6tables -I DOCKER-USER -j "$CHAIN_NAME6"
fi

echo "==> Done. Persist with: sudo netfilter-persistent save"
Save and exit: Ctrl+O, Enter, Ctrl+X.
Before running it, sanity-check the first line is intact:
head -1 ~/openclaw/setup-egress-chains.shIt must print exactly #!/bin/bash, nothing appended. If it says #!/bin/bashpefail again, the paste corrupted, so re-do the nano edit.
Once the first line is clean, make it executable and run it:
chmod +x ~/openclaw/setup-egress-chains.sh
sudo ~/openclaw/setup-egress-chains.sh
Always run firewall scripts with sudo. Running without it can flush the chain and then fail partway, leaving egress wide open.
You can confirm the chain hooked onto the ipset:
sudo ipset list openclaw-allow | grep ReferencesThat should now read References: 1.
Make the firewall survive reboots. The chains and the ipset live only in the kernel, so on their own they vanish on every reboot. Rather than rely on ipset persistence (which isn’t installed by default on Ubuntu 24.04), we run the script automatically at boot, after Docker starts. Create the service file:
sudo nano /etc/systemd/system/openclaw-egress.servicePaste this in (replace YOURNAME with your username):
[Unit]
Description=OpenClaw egress firewall chains
After=docker.service
Wants=docker.service

[Service]
Type=oneshot
ExecStart=/home/YOURNAME/openclaw/setup-egress-chains.sh
RemainAfterExit=yes

[Install]
WantedBy=multi-user.target
Save and exit (Ctrl+O, Enter, Ctrl+X), then enable it so it runs on every boot:
sudo systemctl daemon-reload
sudo systemctl enable openclaw-egress.service
Always run firewall scripts with `sudo`. Running without it can flush the chain and then fail partway, leaving egress wide open.
IPv6 note: the IPv6 chain deliberately default-drops everything except local traffic. Docker containers normally have no global IPv6 address, so all real traffic is IPv4, the IPv6 chain is fail-closed defensive posture.
Step 12.3g: Point the container at dnsmasq
Edit your compose file:
nano ~/openclaw/docker-compose.ymlUnder the gateway service (not at the end of the file, compose files define several services), add at the same indentation as keys like ports:, right underneath it:
dns:
 - YOUR_BRIDGE_IP
If another service uses network_mode: “service:openclaw-gateway” (the CLI container does), it inherits the gateway’s DNS automatically, it can’t take its own dns: setting and doesn’t need one.
Recreate the containers:
cd ~/openclaw && docker compose up -dYou can verify this worked by running:
cd ~/openclaw
docker compose config | grep -A2 -iE 'openclaw-gateway:|dns:'
docker compose config parses the file and prints the canonical version. If your dns: is correctly nested under the gateway service, you'll see it listed with your bridge IP under the openclaw-gateway: block.
Step 12.3h: Persist everything
Save the iptables rules so they reload at boot:
sudo netfilter-persistent saveThis writes /etc/iptables/rules.v4 and rules.v6. The ipset and the firewall chains are recreated at boot by the openclaw-egress service you enabled in Step 12.3f, so the firewall no longer depends on ipset persistence.
Step 12.3i: Test
Allowed domain:
docker exec openclaw-openclaw-gateway-1 curl -4 --max-time 5 https://api.anthropic.com -o /dev/null -w “%{http_code}\n”Expected: a real HTTP code (404, 400, etc., any code means the connection succeeded; the server is just rejecting a bare request).
Blocked domain:
docker exec openclaw-openclaw-gateway-1 curl -4 --max-time 5 https://www.google.com -o /dev/null -w “%{http_code}\n”Expected: 000, connection dropped. (Keep www.google.com off your allowlist so it stays useful as the canonical blocked-domain test.)
Note: this command will pause for about 5 seconds before printing 000. That pause is the block working – the packets are dropped, so curl waits the full --max-time then gives up. A near-instant 000 would mean something else (like DNS), but the timeout-then-000 is the correct, healthy result.
Step 12.3j: Reboot test (do not skip)
This validates boot ordering: ipset restored → rules loaded → Docker up → dnsmasq binds the bridge.
sudo rebootWait 1–2 minutes (”Connection refused” right after a reboot just means SSH isn’t up yet, retry). Then:
sudo systemctl status dnsmasq --no-pager | head -5
sudo ipset list openclaw-allow -terse
sudo iptables -L OPENCLAW_EGRESS -n | tail -5
docker exec openclaw-openclaw-gateway-1 curl -4 --max-time 5 https://api.anthropic.com -o /dev/null -w “%{http_code}\n”
Pass criteria: dnsmasq active (running); ipset exists with References: 1; the chain ends with match-set ACCEPT → LOG → DROP; curl returns a real HTTP code.
Adding domains later
Two steps, no IP resolution, no script re-runs:
- Add a line to /etc/dnsmasq.d/openclaw.conf: ipset=/api.newservice.com/openclaw-allow
- Apply: sudo systemctl restart dnsmasq
Test: docker exec openclaw-openclaw-gateway-1 curl -4 --max-time 5 https://api.newservice.com -o /dev/null -w “%{http_code}\n” → any HTTP code = through, 000 = blocked.
Troubleshooting
An integration times out / an API is unreachable:
- Is the domain allowlisted? grep <domain> /etc/dnsmasq.d/openclaw.conf, if missing, add it.
- Does dnsmasq resolve it? dig +short <domain> @YOUR_BRIDGE_IP
- Did the IPs land in the ipset? sudo ipset list openclaw-allow | grep <one-of-the-ips>
- Watch live drops while reproducing: sudo journalctl -kf | grep OPENCLAW_EGRESS_DROP
dnsmasq won’t start:
- “address already in use” → config is missing bind-dynamic + listen-address (clashing with systemd-resolved on port 53).
- Fails at boot but starts manually → the systemd override (After=docker.service) is missing or malformed; check systemctl cat dnsmasq
After reboot, the match-set rule is missing:
- the openclaw-egress boot service didn't run.
- Check it with sudo systemctl status openclaw-egress.service. If it failed, confirm the ExecStart path matches where your script actually lives, then run sudo systemctl restart openclaw-egress.service.
A redirect chain dies partway (e.g. URL shorteners):
- Each hop is a separate domain; every hop must be allowlisted.
- Find the failing hop: docker exec openclaw-openclaw-gateway-1 curl -4 -L -sv --max-time 10 https://short.link 2>&1 | grep -i location
What you now have
✅ A view of the boundary: the container, your skill choices, the allowlist, loopback access, and egress control
✅ A clean security audit, with any findings understood and addressed
✅ Egress restricted to allowlisted domains, resolved at connection time, so IP rotation can’t silently break an integration
✅ Each allowlist entry covering all subdomains, with a one-line process to add more
✅ DNS-bypass attempts fail closed; IPv4 + IPv6 chains in DOCKER-USER, default DROP, drops logged
✅ Everything persists across reboots, validated by the reboot test
Your deployment is hardened against: data exfiltration to unauthorized domains, malicious skills reaching external servers, and prompt-injection attempts that try to call out to attacker infrastructure.
Part 13: Arnold’s Coaching
Time required: 60 minutes
What you’ll do: Set up Arnold’s coaching the way a real coach works, plan files he reads, a daily log he writes, progression that comes from his memory of what you actually did, and scheduled briefs that tie it together.
This is the part that turns Arnold from a chatbot into a coach who knows your program, remembers last week, and adjusts.
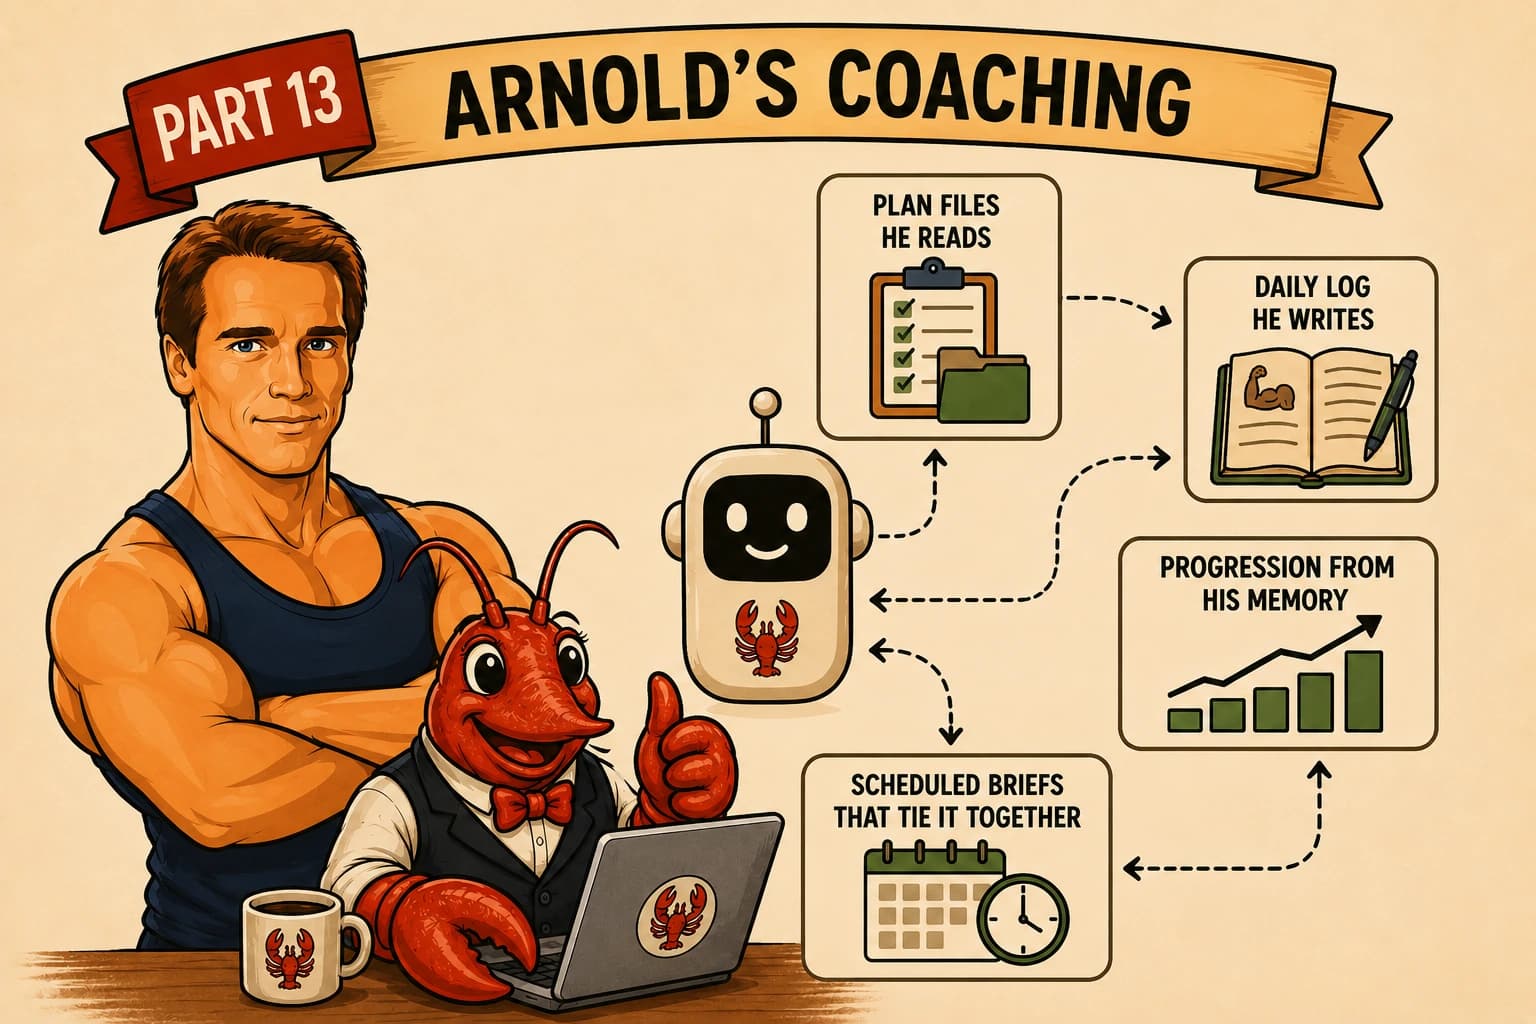
The model
Arnold works the way a real coach does instead, leveraging three moving parts:
- Plan files – your training program and nutrition plan live in their own Markdown files in Arnold’s workspace, which Arnold writes from your conversation with him. He reads the relevant file when it’s relevant, and edits it when you tell him to. The plan lives in one place; changing it is a chat away.
- A daily log – every training day you tell Arnold what you actually did (the weights, the reps, whether you skipped and why). Arnold gives you feedback and writes it to a dated memory file. This log is his continuity.
- Scheduled briefs (crons) – these don’t contain your plan. They’re triggers that fire at a time and tell Arnold to go read the plan, check the log, and brief you. The intelligence is in Arnold reading files, not in the cron.
Progression falls out of this naturally: because Arnold can read weeks of logs, he can see you hit your top set three sessions running and tell you to add weight, or see you skipped twice and recommend a makeup session. None of that is possible if the plan is frozen inside a reminder.
Step 13.1: Have Arnold build your plan files
Everything below uses placeholder content. The structure is the point, swap in your own program, your own meals, your own splits.
You talk to Arnold, and he drafts the plans and writes them to his workspace, the same way he built his own identity in Part 9. You bring the raw material (your goal, your schedule, your equipment, your preferences); Arnold turns it into structured files he can read later.
On Telegram, kick it off, in your own words. For example:
Arnold, let's build my training program. My goal is [build muscle / lose fat / general fitness / an event]. I can train [N] days a week. I have access to [full gym / home dumbbells / bodyweight]. I [do / don't] also run. Roughly, my week looks like [...]. Build me a sensible split, write it to training-program.md, and include clear progression rules so you know when to add weight.Arnold proposes a split, you go back and forth until it’s right, and he writes training-program.md. Then do the same for nutrition:
Arnold, now my nutrition plan. My target is [maintenance / slight deficit / slight surplus], I eat [omnivore / vegetarian / vegan / ...], I avoid [...], and I want protein around [your number or "you suggest"]. Write it to nutrition-plan.md with my daily targets and a typical day's structure.The point is that the conversation produces the file. You can refine either plan any time just by telling Arnold what to change, he rewrites the file. That’s the whole advantage of the file-based model: the plan is durable, but editing it is a chat away.
What Arnold is building toward. So you know what “good” looks like, here’s the kind of structure these files should end up with. You don’t type this, it’s the shape Arnold should produce. If his draft is thinner than this, tell him to add progression rules or a clearer split.
training-program.md:
# Training Program

## Split (example: 5-day)
- Mon: Upper A (push focus)
- Tue: Lower A (hip hinge / squat)
- Wed: Easy run
- Thu: Upper B (pull focus)
- Fri: Lower B (single-leg / posterior chain)
- Sat/Sun: rest or optional run

## Upper A
- [Exercise] [sets] × [rep range] x weight
- ...

## Progression rules
- Hit the top of the rep range on all working sets → add [increment] next session.
- Miss the bottom of the range two sessions running → hold or deload ~10%.nutrition-plan.md:
# Nutrition Plan

## Daily targets
- Calories: [target]
- Protein: [target] (the number that matters most)
- Notes: [dietary pattern, foods to avoid]

## Typical day
- Breakfast / Lunch / Dinner / Supplements: [...]
Confirm Arnold actually wrote the files:
ls -la ~/.openclaw/workspace/training-program.md ~/.openclaw/workspace/nutrition-plan.mdBoth should exist. If Arnold discussed the plan but nothing landed on disk, tell him explicitly to write it to the file, mental notes don’t survive a new session.
Step 13.2: Point Arnold at the files
So Arnold reliably reads the plans at the right moments, add a short pointer to his AGENTS.md (his workspace instructions). This is the one manual edit in this part, everything else is conversation. Don’t paste the plans here; just tell him where they live and when to read them.
nano ~/.openclaw/workspace/AGENTS.mdAdd a section like:
## Coaching files
- `training-program.md` — my current split, exercises, and progression rules. Read it when briefing a session or deciding whether to progress weight.
- `nutrition-plan.md` — my daily targets and meal structure. Read it for food/macro questions.
- Daily logs in `memory/YYYY-MM-DD.md` are the record of what I actually did. Read recent ones before giving progression advice.
This is the wiring that makes the file-based model work: Arnold reads the runtime startup context, sees these pointers, and knows to pull the right file at the right moment.
Note you could also just ask Arnold to add this section to his own AGENTS.md, the manual edit is simply the reliable way.
Step 13.3: Logging
Coaching only adapts if Arnold knows what you actually did. So after each training session, do tell him:
Log today: Upper A. Bench [weights/reps across sets], incline DB [...], all top-of-range. Felt strong.Arnold writes it into today’s memory/YYYY-MM-DD.md (his daily log), under a Training section. Over time these logs become the history he reasons over. A skipped day is worth logging too, with the reason:
Skipped Lower A today — woke late, social event. Not rescheduling.That’s exactly the kind of entry that lets Arnold later say “you’ve skipped lower twice, let’s make it up Saturday” instead of blindly repeating the plan.
You can verify the log is being written:
cat ~/.openclaw/workspace/memory/$(date +%F).mdYou should see your session recorded under a dated heading. If Arnold keeps it only “in his head” and nothing lands in the file, remind him explicitly to write logs to memory/YYYY-MM-DD.md, per his AGENTS.md.
Step 13.4: Schedule the briefs (triggers, not content)
Now the scheduled tasks (crons). Each one is a trigger that tells Arnold to read the relevant files and brief you, it carries no plan content itself. As in Part 11’s reasoning, these are isolated jobs that announce to Telegram so they fire independently of the disabled heartbeat.
Morning training brief (the Whoop-aware version comes in Part 14; this is the base):
Arnold, create a recurring cron job: every day at [time], isolated job, announce to me on Telegram. The job:
- Read training-program.md and today's day-of-week to determine today's session.
- Read the last week of memory/ logs to see what I've done and whether anything needs a makeup.
- Brief me: today's session and exercises, plus any adjustment based on recent history.
Evening nutrition / log nudge:
Arnold, create a recurring cron job: every day at [time], isolated job, announce to me on Telegram. The job:
- If I haven't logged a training session today and today was a training day, nudge me to log it.
- Otherwise, a short check-in against my nutrition-plan.md targets.
Notice neither cron contains your plan. They say “read the file, check the log, brief me.” Edit your program by editing training-program.md, the briefs automatically reflect it next morning. That’s the whole advantage.
A design rule based on my experience: keep crons to reading and messaging. Don’t have a cron silently rewrite your plan or memory files on its own, autonomous edits drift and corrupt over time. Plan changes should happen in conversation with you, where you can see and approve them.
Step 13.5: Verify
Arnold, list my cron jobs with their schedules and next run times.Then sanity-check the loop end to end: log a session (13.3), confirm it lands in the dated file, and wait for the next morning brief to see whether it reflects your history. If the brief is generic and ignores your logs, check that the AGENTS.md pointers (13.2) are in place and that logs are actually being written to memory/.
Step 13.6: The smart briefs (next part)
The morning brief above is the base. Its upgrade, the recovery-aware version, has Arnold also read your Whoop recovery and adjust how hard to push today (full session on a green day, back off on a red one). That needs the Whoop integration, so it’s Part 14. Same architecture: the cron triggers Arnold to read recovery data and the plan and the log, then brief.
A second optional upgrade, if you connected Gmail/Calendar in Part 10: Arnold can spot a dinner out on your calendar and suggest plan-friendly options before you go. Same pattern, a trigger that orchestrates reads.
What you now have
✅ Training and nutrition plans Arnold built from talking with you, and rewrites on request
✅ A daily-logging habit that gives Arnold real history to coach from
✅ Progression that emerges from Arnold reading your logs, not a frozen script
✅ Scheduled briefs that are triggers orchestrating file reads, not hardcoded content
✅ Ready for the recovery-aware upgrade in Part 14
Part 14: Whoop Integration
Time required: 30–45 minutes
What you’ll do: Connect Whoop so Arnold reads your recovery, sleep, and strain each morning, stores it, and adjusts your training to how recovered you actually are, cross-referenced against the plan and log you set up in Part 13.
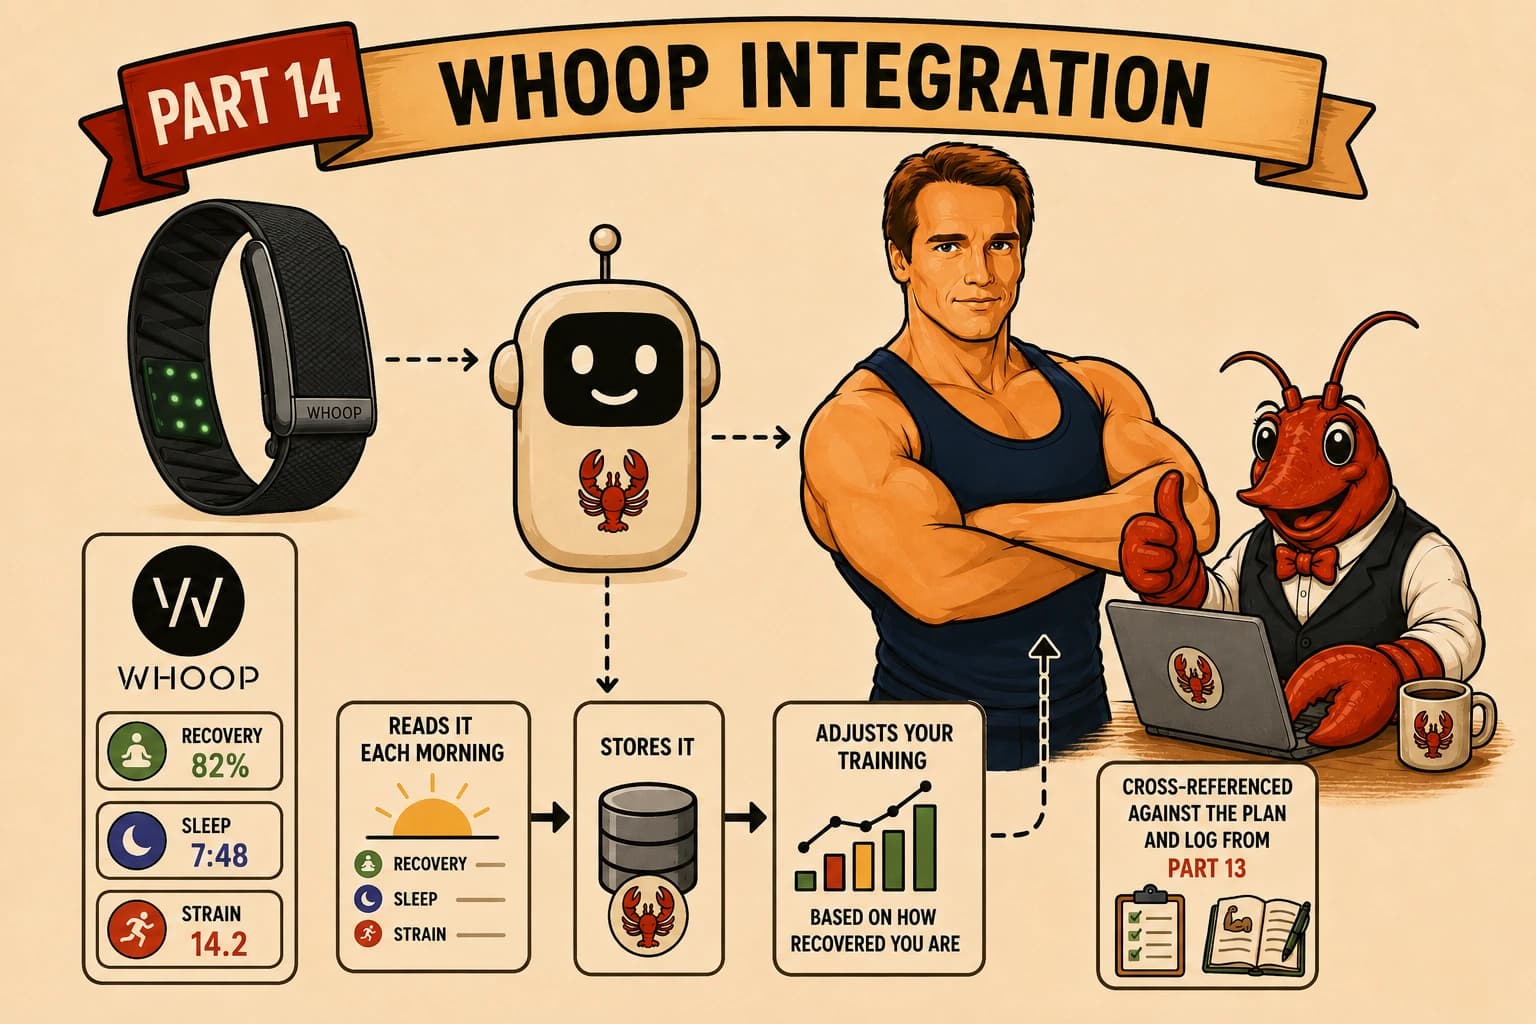
How this fits the Part 13 model
Part 13 established the architecture: plan files Arnold reads, a daily log he writes, crons that trigger reads. Whoop slots straight into it. The morning brief becomes a trigger that tells Arnold to:
- Fetch your latest recovery and sleep from Whoop’s API,
- Store them to small JSON files in his workspace (so the data persists and he can reason over trends, not just today),
- Read today’s planned session from training-program.md and recent memory/ logs,
- Decide the recovery-adjusted recommendation and brief you,
- Log the result into today’s memory/YYYY-MM-DD.md.
So Whoop isn’t a bolt-on; it’s another data source Arnold reads alongside your plan and history. The persistence step matters, storing recovery to a file means Arnold can say “third red day in a row” instead of seeing each morning in isolation.
Step 14.1: Allowlist Whoop in your egress firewall
If you skipped the egress firewall in Part 12, you can skip this step.
Otherwise, do this first, or nothing else works. In Part 12 you restricted the gateway to an allowlist and block everything else. Whoop’s API isn’t on it, so Arnold’s calls will be silently dropped until you add it.
This is the standard pattern in this setup: a blocked external API means “allowlist the domain,” not “debug the integration.”
echo 'ipset=/api.prod.whoop.com/openclaw-allow' | sudo tee -a /etc/dnsmasq.d/openclaw.conf
sudo systemctl restart dnsmasq
Confirm it’s reachable from inside the gateway container:
docker exec openclaw-openclaw-gateway-1 curl -4 --max-time 5 https://api.prod.whoop.com -o /dev/null -w "%{http_code}\n"Any real HTTP code (even 401/404) means the connection got through. 000 means still blocked, recheck the line and that dnsmasq restarted.
Step 14.2: Create a Whoop developer app
- Go to the Whoop developer dashboard (developer-dashboard.whoop.com) and sign in. Create a new app (New App).
- Name: anything (e.g. “Arnold”). Logo, contacts, and privacy-policy fields can be left blank/default.
- Redirect URLs: add http://localhost:8080/callback. Nothing runs there, it’s just where the one-time login sends your authorization code, which you copy from the browser’s address bar (same trick as Gmail in Part 10).
- Scopes: tick the checkboxes Arnold needs:
- read:recovery (score, HRV, resting heart rate)
- read:sleep
- read:cycles (day strain)
- read:profile
- Webhooks: leave blank, we poll, not push.
- Click Create App. The dashboard shows your Client ID and Client Secret, keep them for the next step.
Step 14.3: Get your first tokens
You need an access token and a refresh token, obtained once via a browser login.
- Build Whoop’s authorization URL and open it in your browser. It points at Whoop’s authorize endpoint with your Client ID, your redirect URI, and a space-separated scope list that includes offline, so you don’t need to keep re-authorizing all the time. Whoop’s OAuth quickstart shows the exact endpoint and the required short random state parameter, follow it.
- Log in and approve. The browser redirects to http://localhost:8080/callback?code=XXXXX. Note the page will not load (nothing’s there), and that’s expected. Just copy the code= value from the address bar.
- Exchange the code for tokens on the server (fill in your values):
curl -s -X POST https://api.prod.whoop.com/oauth/oauth2/token \
 -H 'Content-Type: application/x-www-form-urlencoded' \
 -d 'grant_type=authorization_code' \
 -d 'client_id=YOUR_CLIENT_ID' \
 -d 'client_secret=YOUR_CLIENT_SECRET' \
 -d 'code=THE_CODE_YOU_COPIED' \
 -d 'redirect_uri=http://localhost:8080/callback' | python3 -m json.tool
The response contains access_token, refresh_token, and expires_in. If there’s no refresh_token, the offline scope didn’t make it into the authorize URL, fix that and redo. Keep the output for the next step.
Step 14.4: Save the credentials file
Arnold reads Whoop tokens from one file on his workspace volume:
mkdir -p ~/.openclaw/workspace/whoop-data
cat > ~/.openclaw/workspace/whoop-credentials.json << 'EOF'
{
 "client_id": "YOUR_CLIENT_ID",
 "client_secret": "YOUR_CLIENT_SECRET",
 "access_token": "YOUR_ACCESS_TOKEN",
 "refresh_token": "YOUR_REFRESH_TOKEN",
 "token_expires_at": 0
}
EOF
chmod 600 ~/.openclaw/workspace/whoop-credentials.json
sudo chown 1000:1000 ~/.openclaw/workspace/whoop-credentials.json ~/.openclaw/workspace/whoop-data(token_expires_at: 0 forces a refresh on first run.) The whoop-data/ directory is where Arnold will persist recovery and sleep, see 14.5.
Why chown 1000? The container runs as user 1000. Arnold rewrites this file on every token refresh, so it must be owned by 1000 or you’ll get silent permission errors.
⚠️ Whoop uses rotating refresh tokens. Each refresh returns a new refresh token replacing the old one, so the job must always write the new one back. If a refresh ever succeeds but the new token isn’t saved, access breaks permanently and you’ll redo the browser login. This is the first thing to check if Whoop stops working after weeks of running fine.
Step 14.5: The recovery-aware morning brief
This upgrades the base morning brief from Part 13. It’s still an isolated, announce-to-Telegram cron. Send Arnold:
Arnold, update my morning brief to be recovery-aware. Recurring cron job: every day at [time], isolated job, announce to me on Telegram. The job does this in order:

1. TOKEN: Read whoop-credentials.json. If token_expires_at is within an hour of now (or 0), refresh:
 POST https://api.prod.whoop.com/oauth/oauth2/token with grant_type=refresh_token, client_id, client_secret, refresh_token.
 Save the NEW access_token, refresh_token, and token_expires_at back to the file (Whoop rotates the refresh token — always write the new one).

2. FETCH + STORE: With Authorization: Bearer <access_token>:
 GET https://api.prod.whoop.com/developer/v2/recovery?limit=1
 GET https://api.prod.whoop.com/developer/v2/activity/sleep?limit=1
 Save the results into whoop-data/recovery.json and whoop-data/sleep.json (append/update by date) so the history persists. If today's recovery isn't scored yet, note that and use the most recent scored day.

3. READ PLAN + LOG: Read training-program.md for today's session, and the last week of memory/ logs for what I've actually done (skips, makeups).

4. BRIEF ME with:
 - Recovery score + colour, HRV, resting HR, sleep performance
 - Today's planned session
 - A recovery-adjusted recommendation:
 🟢 Green (67–100%): full session, chase progression
 🟡 Yellow (34–66%): train as planned, no PR attempts, don't cut volume
 🔴 Red (<34%): reduce intensity or rest, depending on how I feel
 - Any makeup note from recent history. One line of Arnold energy to close.

5. LOG: Write a short summary of today's recovery + the recommendation into today's memory/YYYY-MM-DD.md.
Confirm it scheduled:
Arnold, list my cron jobs with their schedules and next run times.The thresholds above are sensible defaults; tune them to your own experience by telling Arnold to adjust. And keep the cron to reading, storing Whoop data, and messaging, the same “no autonomous rewriting of plan files” rule from Part 13 applies; plan changes happen in conversation.
Step 14.6: Test it
Arnold, run that Whoop morning brief now, as a one-off, so we can check it works.Check three things:
- A brief arrives on Telegram with real recovery/sleep numbers and today’s session. That proves the whole chain: firewall → Whoop → token → plan read → brief.
- The data persisted:
cat ~/.openclaw/workspace/whoop-data/recovery.json- The token rotated:
docker compose exec openclaw-gateway sh -c 'cat /home/node/.openclaw/workspace/whoop-credentials.json' | python3 -m json.toolIf the brief errors fetching Whoop, check 14.1 (firewall) first, that’s the most common cause, then that the tokens are valid.
Note on container paths: your workspace is mounted, so ~/.openclaw/workspace/ on the host is /home/node/.openclaw/workspace/ inside the container. Use the host path for editing, the container path inside docker compose exec.
Strava
Strava can feed runs and rides too, but they recently made a change where, to access the Strava API, you’ll need to have a subscription to the app.
What you now have
✅ Whoop allowlisted through your egress firewall
✅ Whoop connected via morning polling, with data persisted to JSON for trend reasoning
✅ A recovery-aware brief that cross-references your plan and log, not a hardcoded prompt
✅ Self-refreshing rotating tokens, verified by a real test run
The end
The full guide is published as four different articles:
- Setting up your server (Intro → Part 3) - link
- Installing OpenClaw (Part 4 → Part 6) - link
- Configuring your OpenClaw (Part 7 → Part 10) - link
- Customizing your first agent to your needs (Part 11 → end)
If you’d like to check out one of the previous articles, you can use the links above.
Getting help
The easiest way to solve any problem is to take a screenshot and explain your problem to whatever AI model you use – Claude, ChatGPT, Gemini, etc. It will help you solve your problem.
Helpful resources:
- OpenClaw docs: docs.openclaw.ai
- GitHub issues: github.com/openclaw/openclaw/issues
- OpenClaw Discord: via the project’s site/repo
A quick disclaimer
- This is a write-up of what worked for me, offered with no warranties, follow it at your own risk.
- It’s not a security guarantee, and keeping your server secure is your responsibility.
- Costs are real and can change, so watch your own billing (a cloud server bills until you destroy it).
- Referenced tools and services belong to their owners and change over time; this reflects how things worked when written.